
OK, on this page we’ll go through step-by-step how to put together the Turning Prayer 3D printing. And as I did before, I will simply refer to it as the “printing”
I did make some videos about how this 3D printing is put together. These videos are also available on YouTube, and their YouTube names are the same as the names they have here. The page where I placed these videos follows:
Videos that discuss how the Turning Prayer is put together
Note: the Sketchup drawing files that I used in Sketchup to create all this are listed at the bottom of this page. You should be able to download them if you want, and then open them on your own computer if you have downloaded Sketchup (there is a free version of the Sketchup program that anyone can download)
Step one: Let’s just look at a view of the printing. As you know, there are two sides to the printing. The two sides in terms of their wording content and the tint of their area of color are not the same. However, they are constructed using the same steps for each side, except that different letters and different colors are used. So, I am exclusively going to show how one side of the printing is created, understanding that the other side is constructed in the same exact set of steps. As I described earlier, one side is directed outward towards the whole Universe, and it has diamonds to give that emphasis, so I will call this side of the printing the “Diamond Side”, the other side is directed more inward toward the one single person, and uses rubies as the gemstone that adds emphasis of its intentions, so I will call this side the “Ruby Side”. And for this construction set of steps, I will only be referring to the diamond side.
I will note here at the start that the whole printing is 35mm in diameter, and about 5mm thick (at the rim), its a little thicker if one includes the sapphire covers since they “stick out” a little bit. Sketchup has a little trouble with really detailed display of and manipulation of items of this small size. Just look at the printing for a moment and imagine how small those letters are. In order to get Sketchup to cooperate in creating my drawings for some of the parts of this printing, I scaled the printing size in the drawing up by a factor of 10, so that it is 3.5cm in diameter while I am creating or modifying the Sketchup drawing files. After I modify or create the Sketchup files, then I re-scale the drawings down to 1/10th size. So, if you go to the Trimble 3D warehouse and download the actual drawing files, and if you want to make your own renditions of the Turning Prayer, or just create your own renditions of this type of printing, you may find that you need to scale up your drawings by x10 to work on the drawings, and when you get your work just the way you want it, then remember to scale your drawings back by reducing them to 1/10th size.
So here’s the diamond side all put together
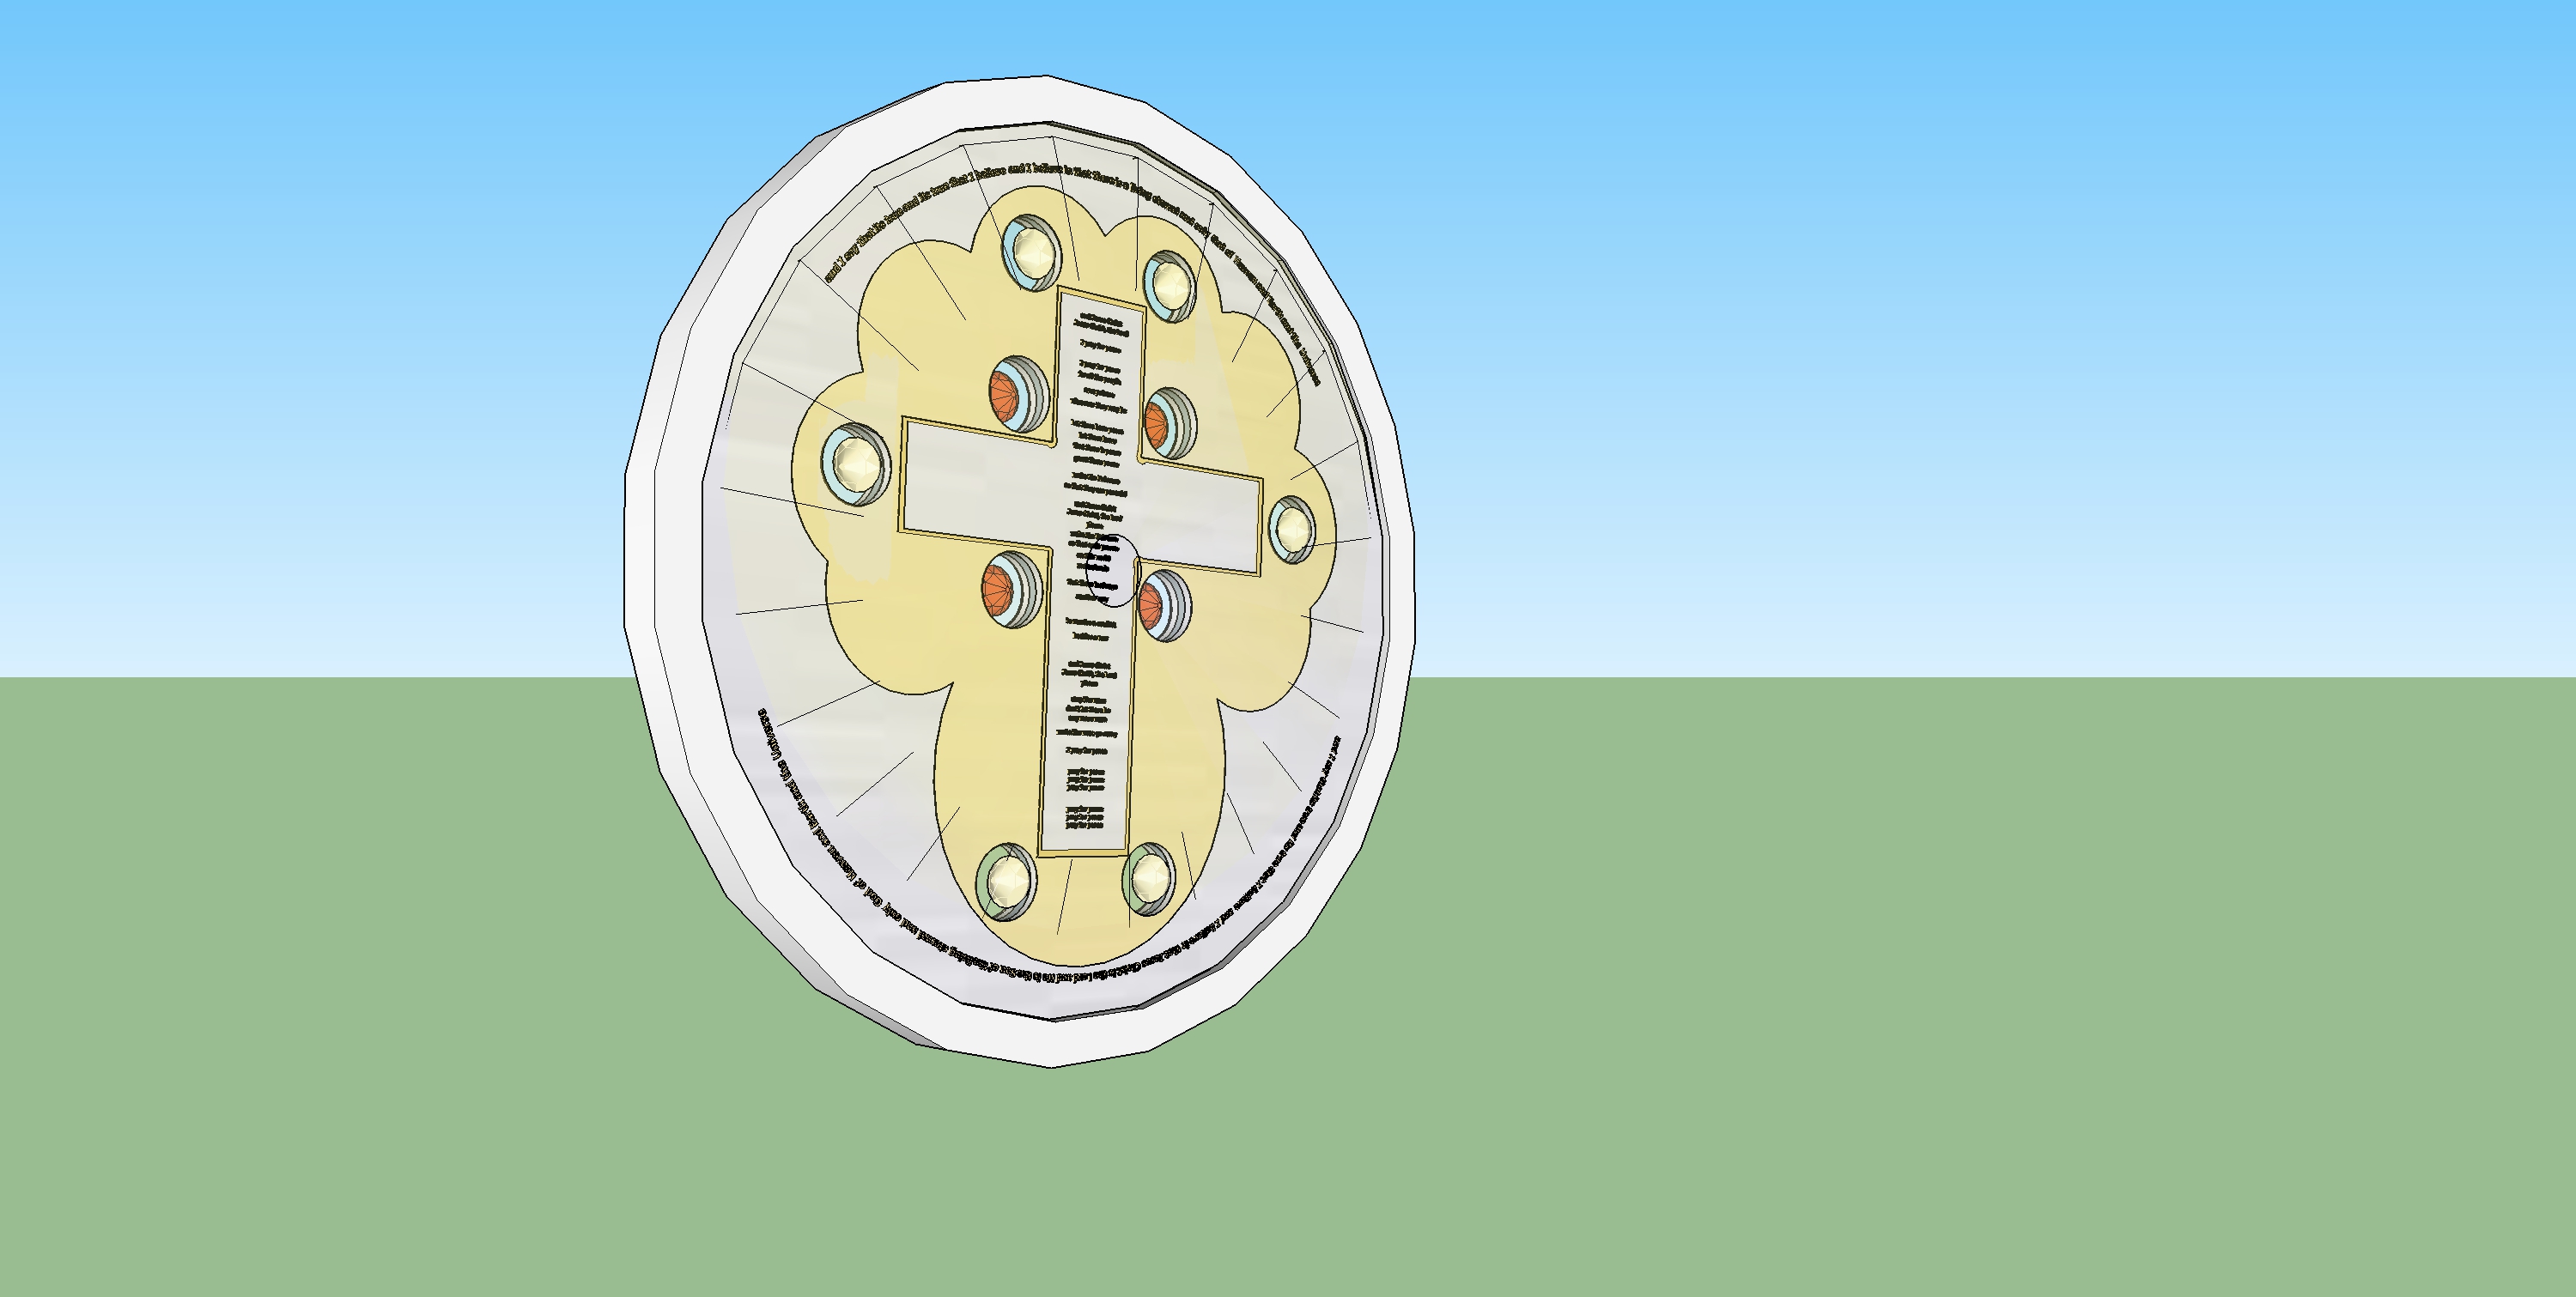
I’ll turn the view a little just to let you see the diamond side from a slightly different angle.
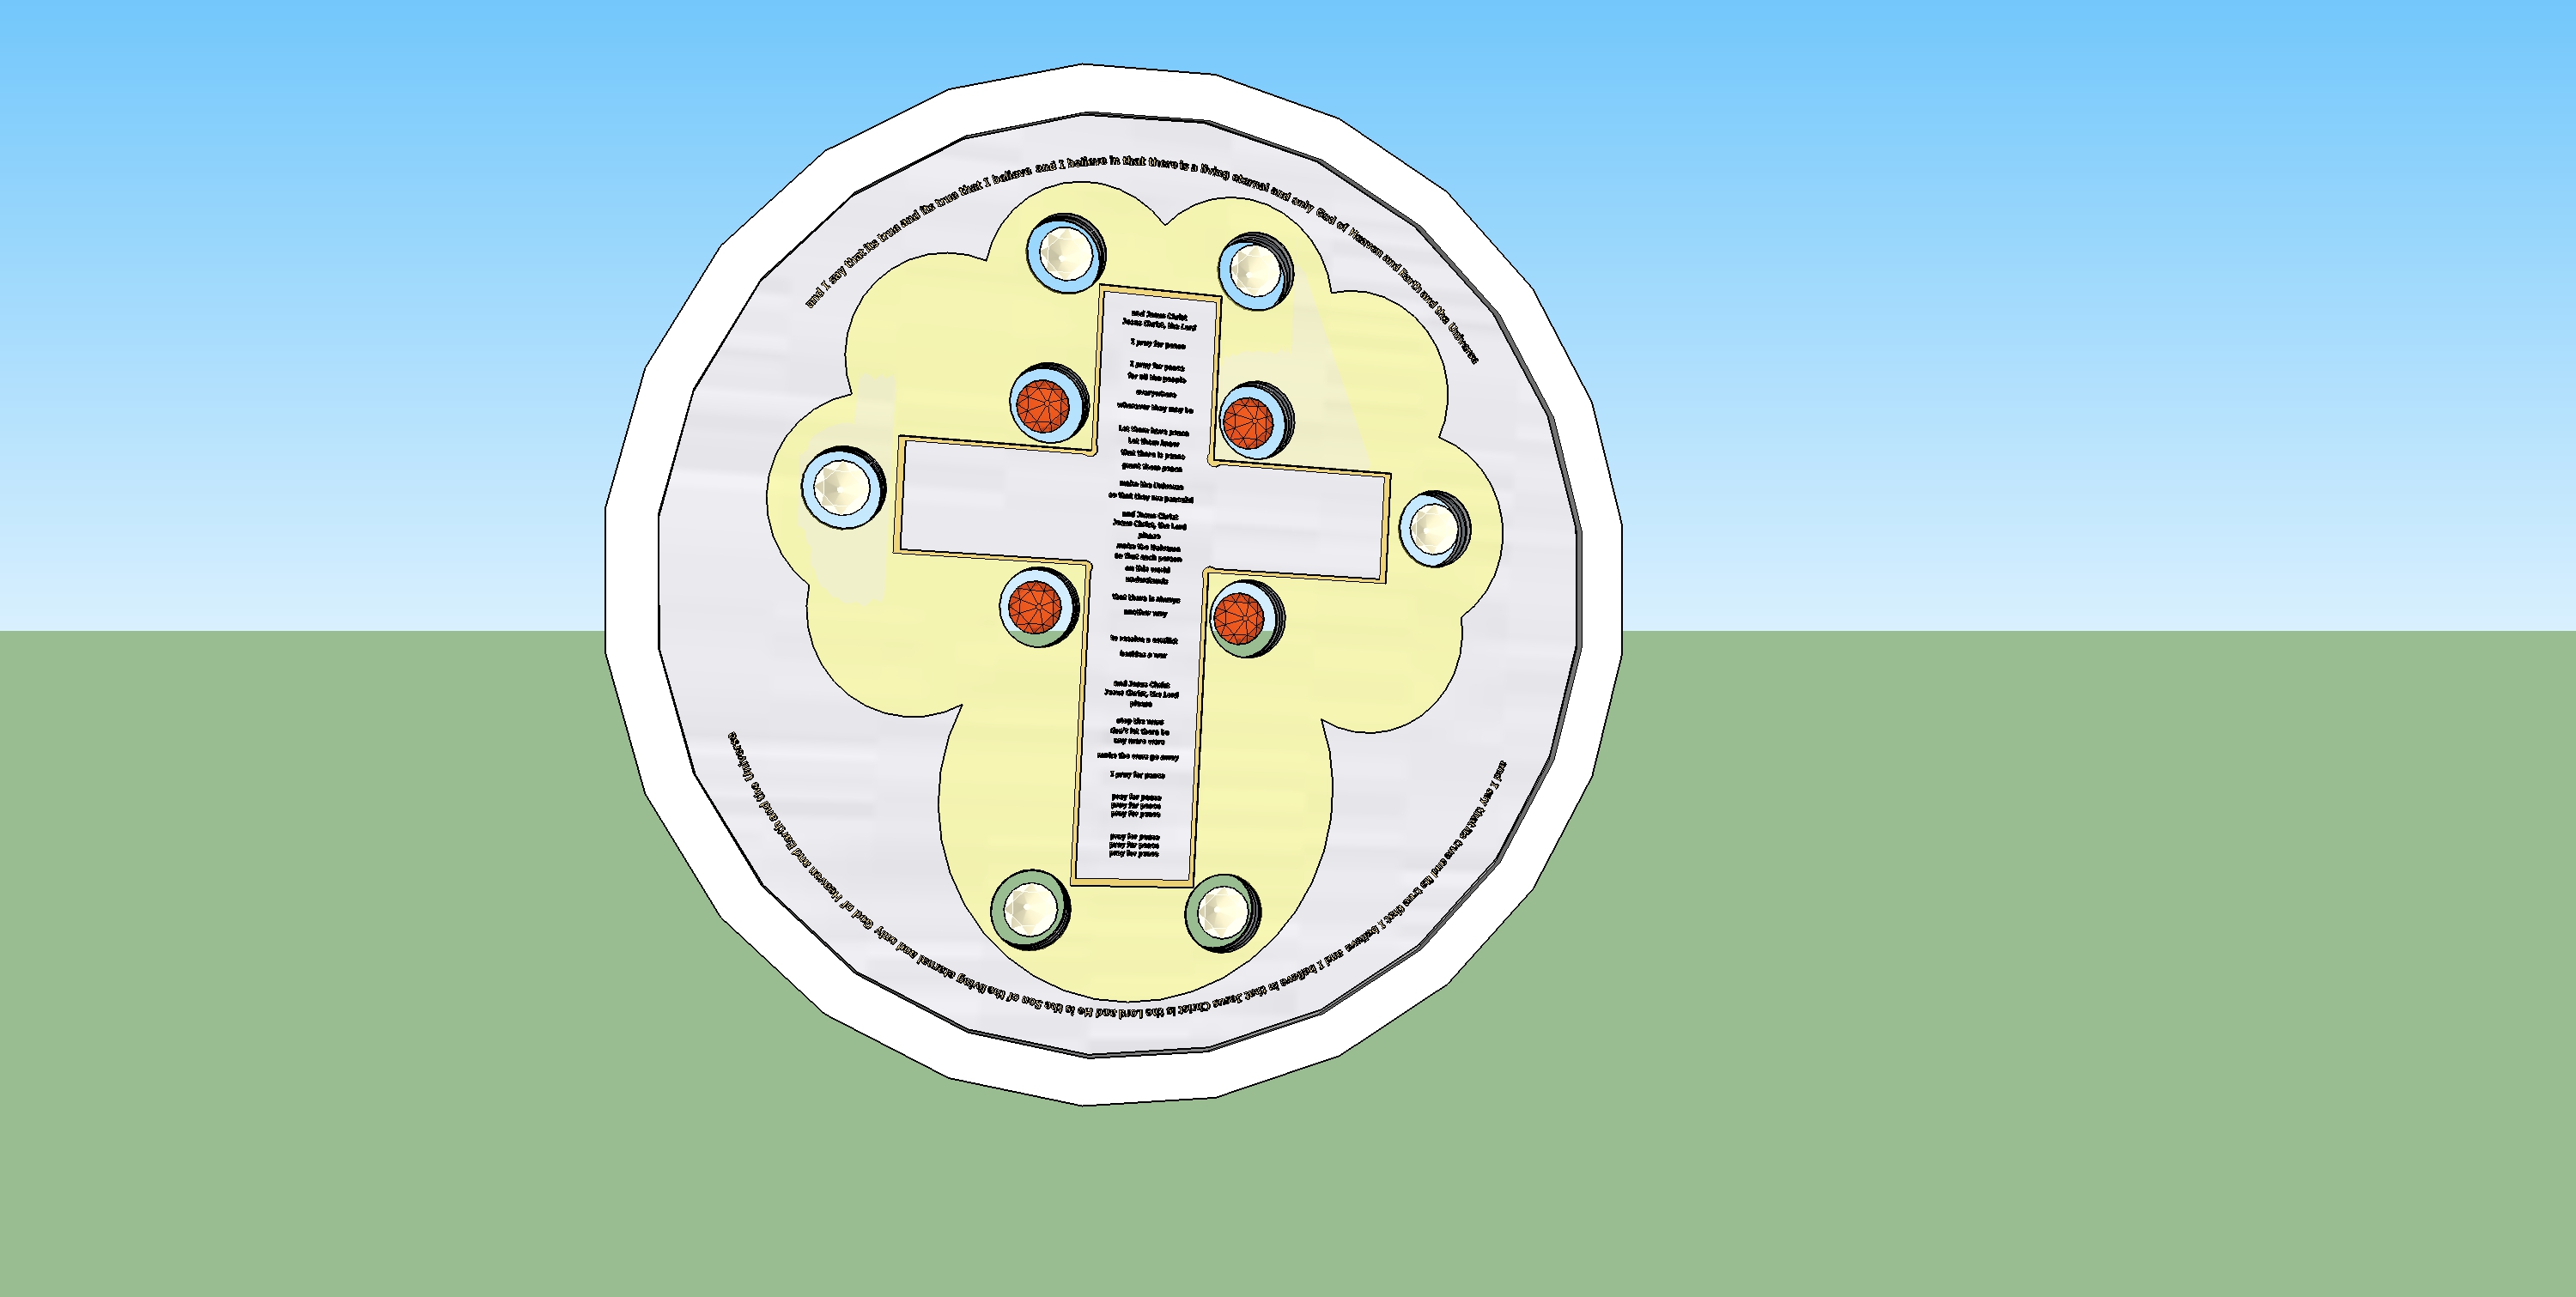
The printing has its areas of message via words and its areas of color and imagery via gemstones. There is a cover over all of this that acts to protect the contents from nicks, bumps, and scrapes. This cover is a crystalline form of industrial sapphire, polished up to a value of surface smoothness that allows it to be optically transparent to visible light. It is exactly as the cover of a watch would be. You can imagine that if this cover is transparent, then it is going to be difficult for me to try to discuss it very much with you, because you cannot see it and you would not “see” anything that I am doing with it.
To get around this problem, I have altered the color values of this sapphire lens or cover so that it has a little color to it, but I have set the opacity to be very low so that you can look right through it. Later in this discussion, as I show you exactly what I am proposing to do with this sapphire lens cover, I will bump its opacity way up so that its easy to “see” what is happening. Just remember, all the time, with the real printing, these sapphire lens covers (there is one of them on each side of the printing) are actually optically clear and transparent, you would not be able to see them unless you tilted the printing around in a bright light to catch reflections bouncing off these lenses.
I’ll emphasize this by showing the printing with some color and a little opacity added to the lens of the diamond side of the printing.
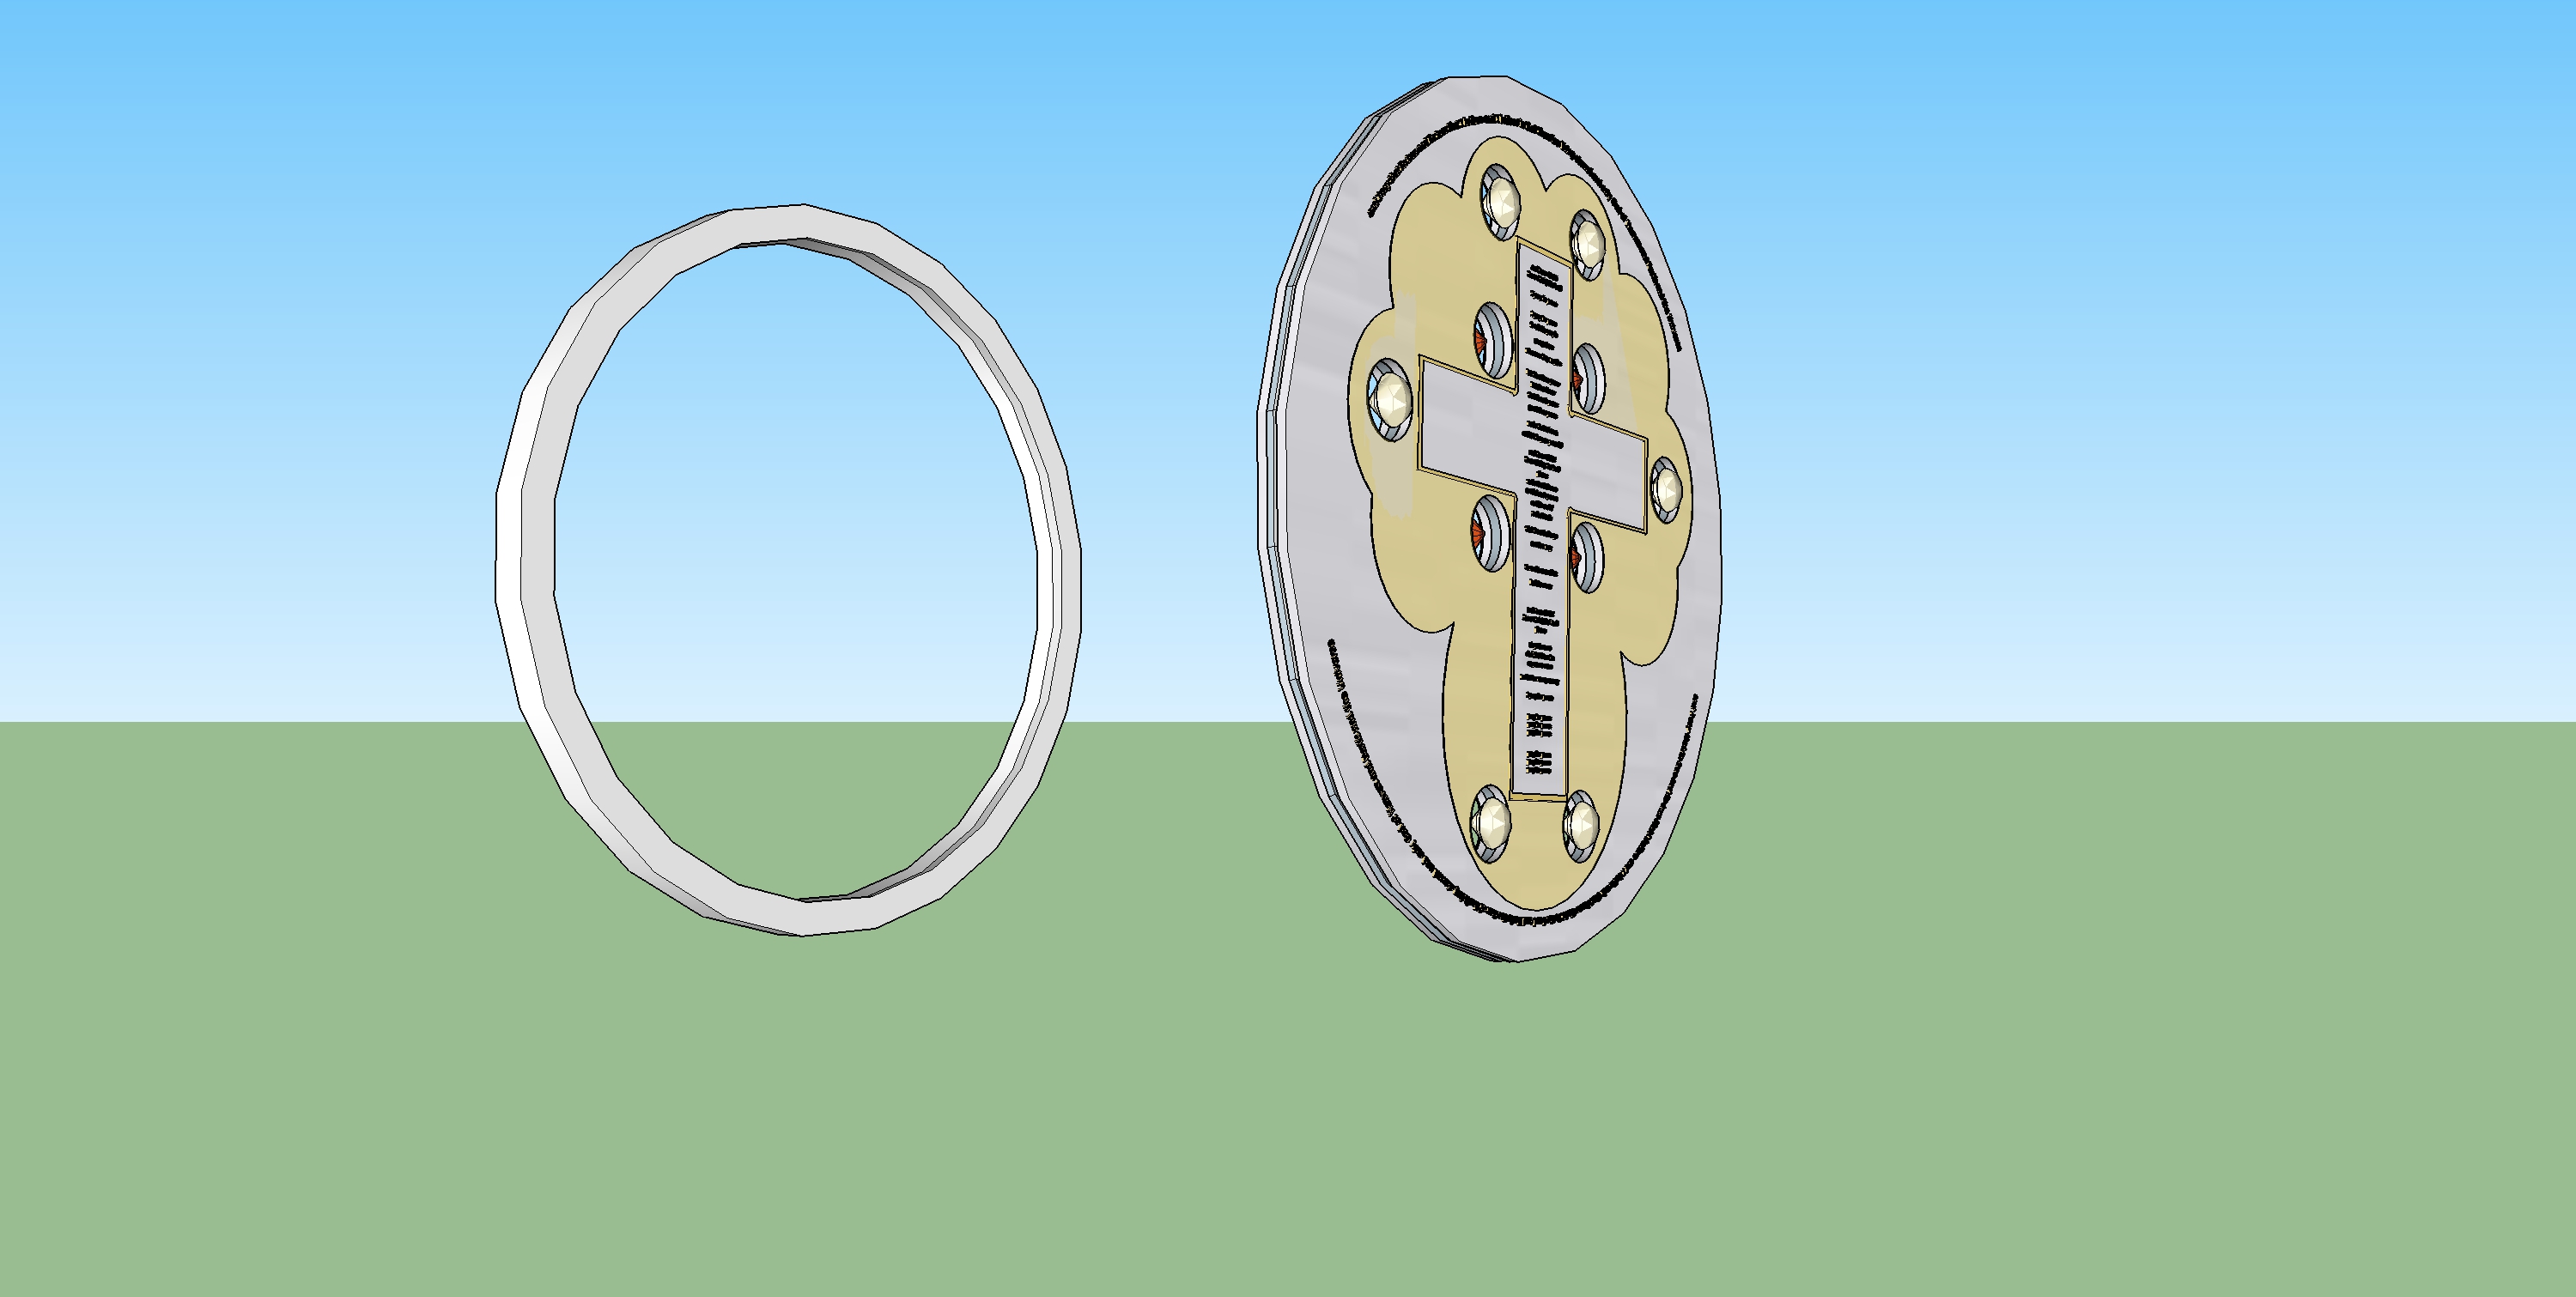
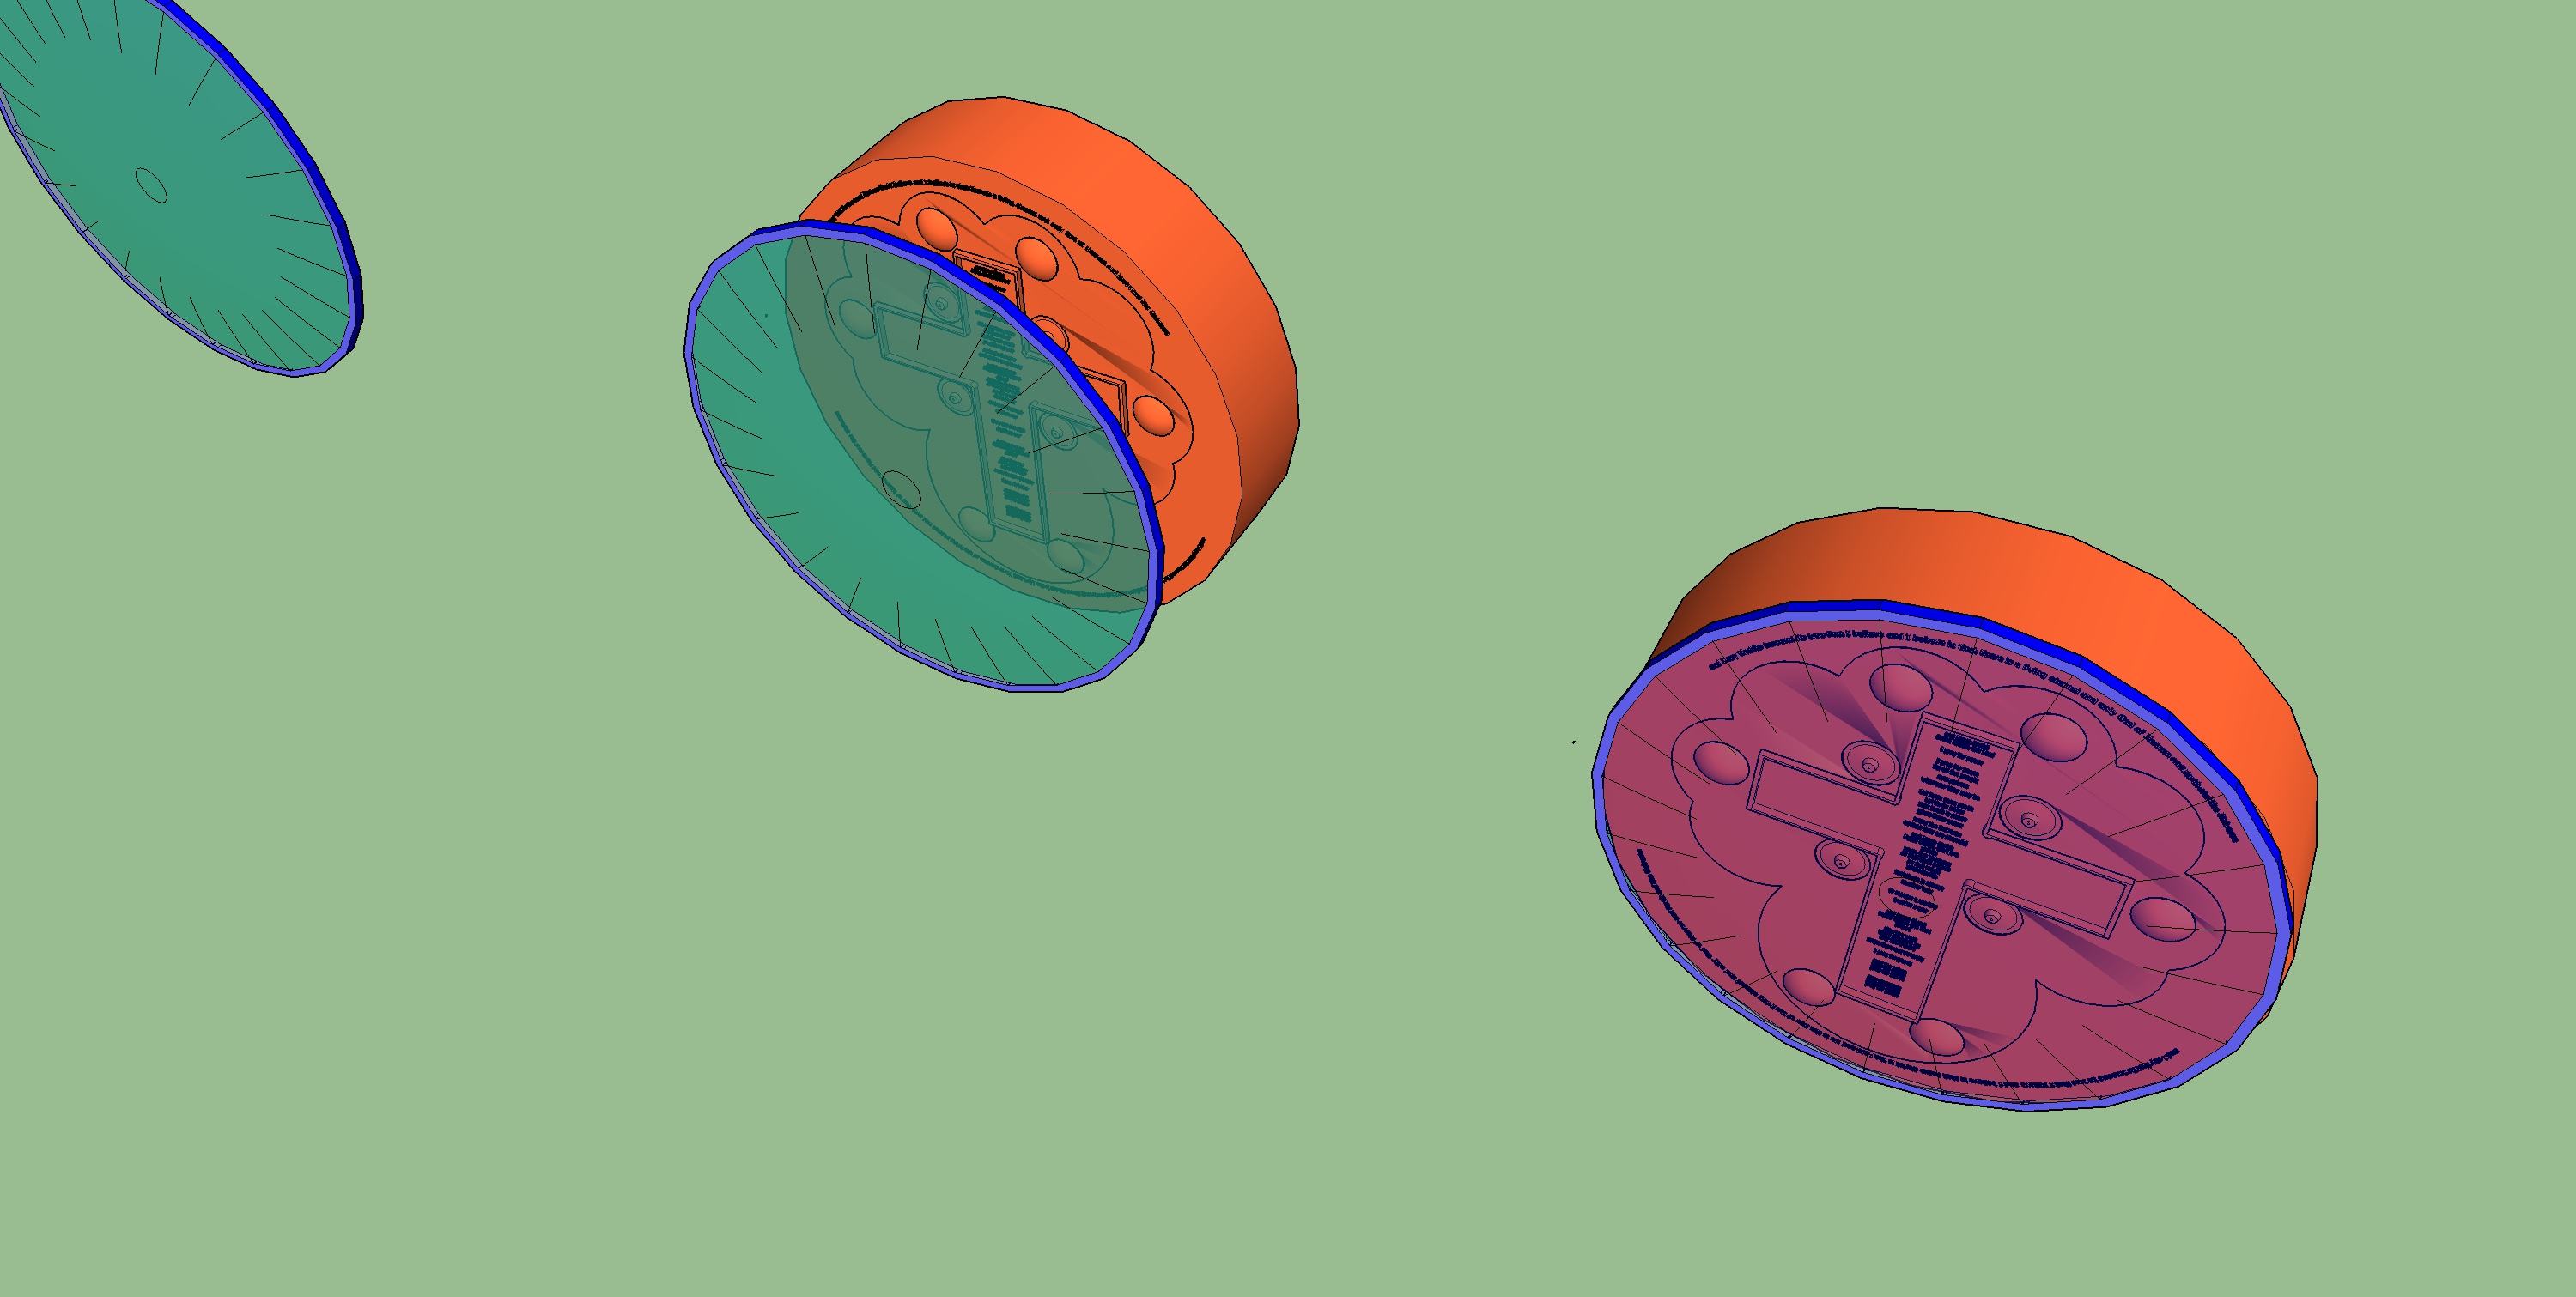
If you look carefully, you can see the radial lines around the periphery of the printing and these rise up and point to a circle at the center of the printing and this circle seems to float off the surface of the printing. This is the lens. The next step is to pull the lens off the printing somewhat to better demonstrate the lens and its relation to the rest of the printing.

The lens of the diamond side has been pulled away. Again, last time I will beat this point up in this discussion, the actual lens is transparent. In a “real” version of the above view, you would not see anything in front of the printing because the lens is transparent, and so is the lens on the ruby side. I just altered the optical properties of the lens in this drawing so that everyone understands what’s going on with the sapphire cover lenses.
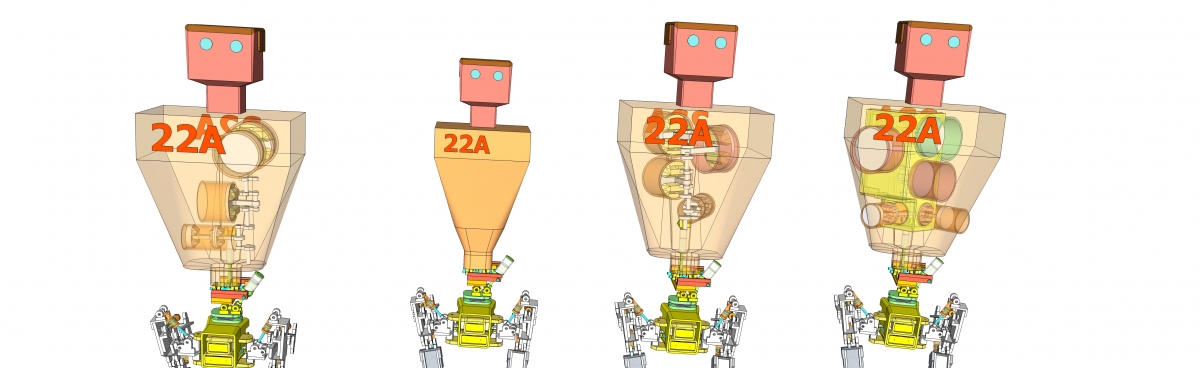
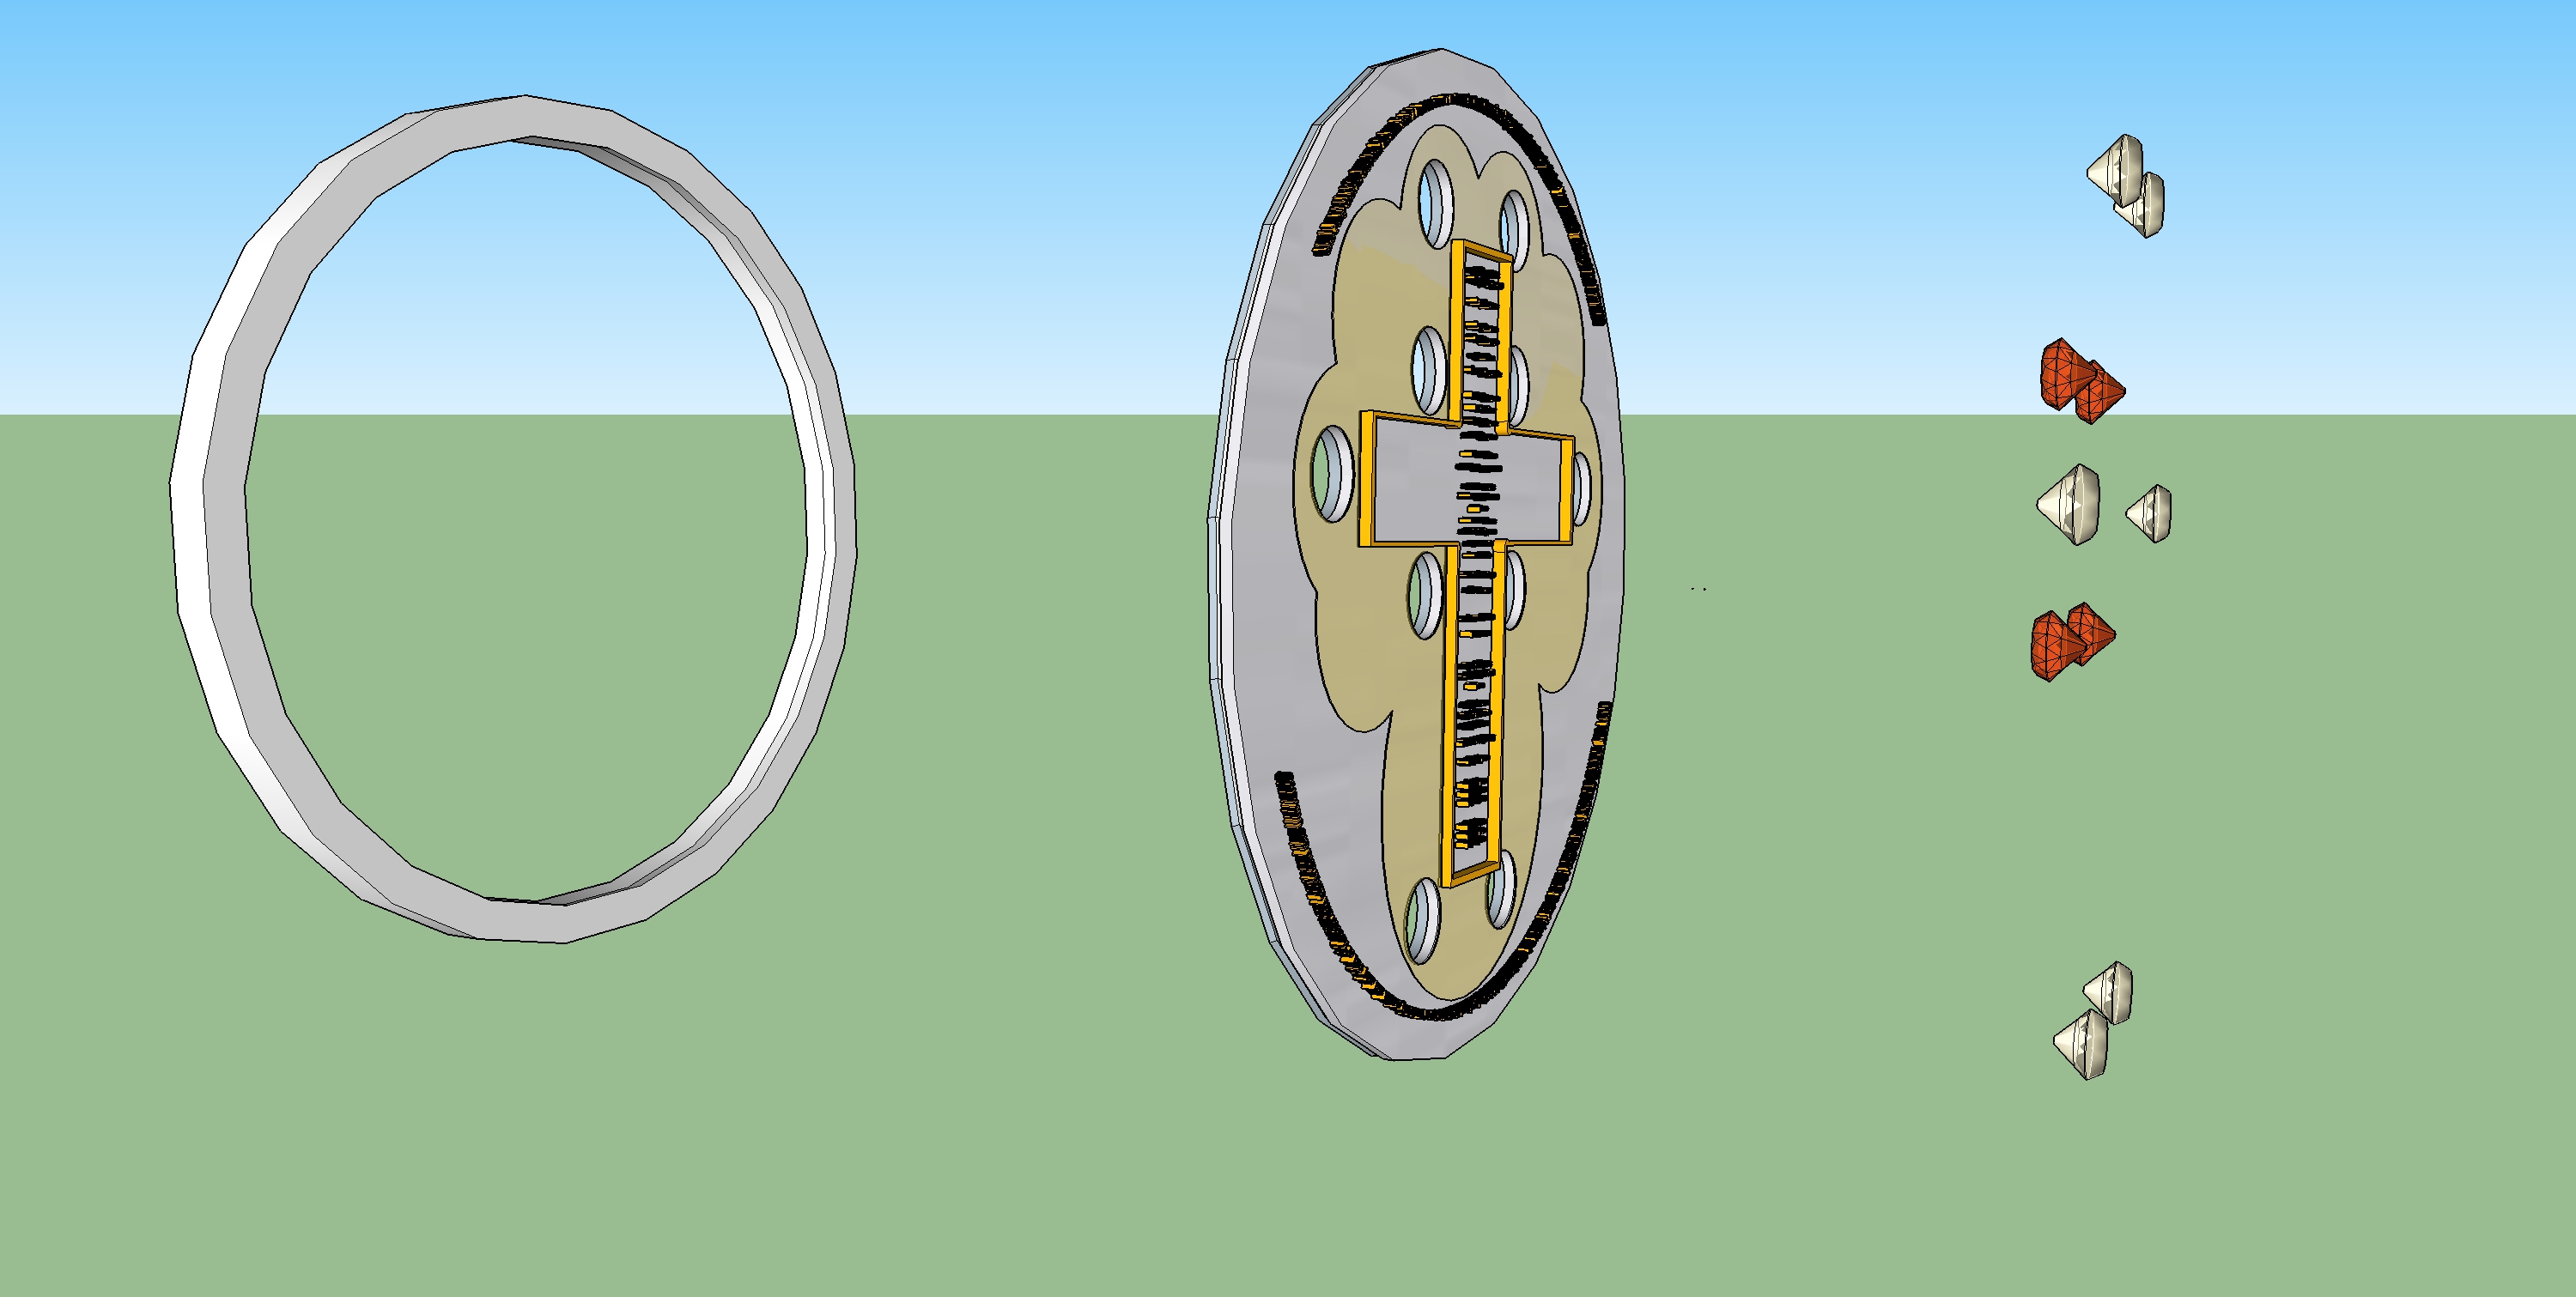
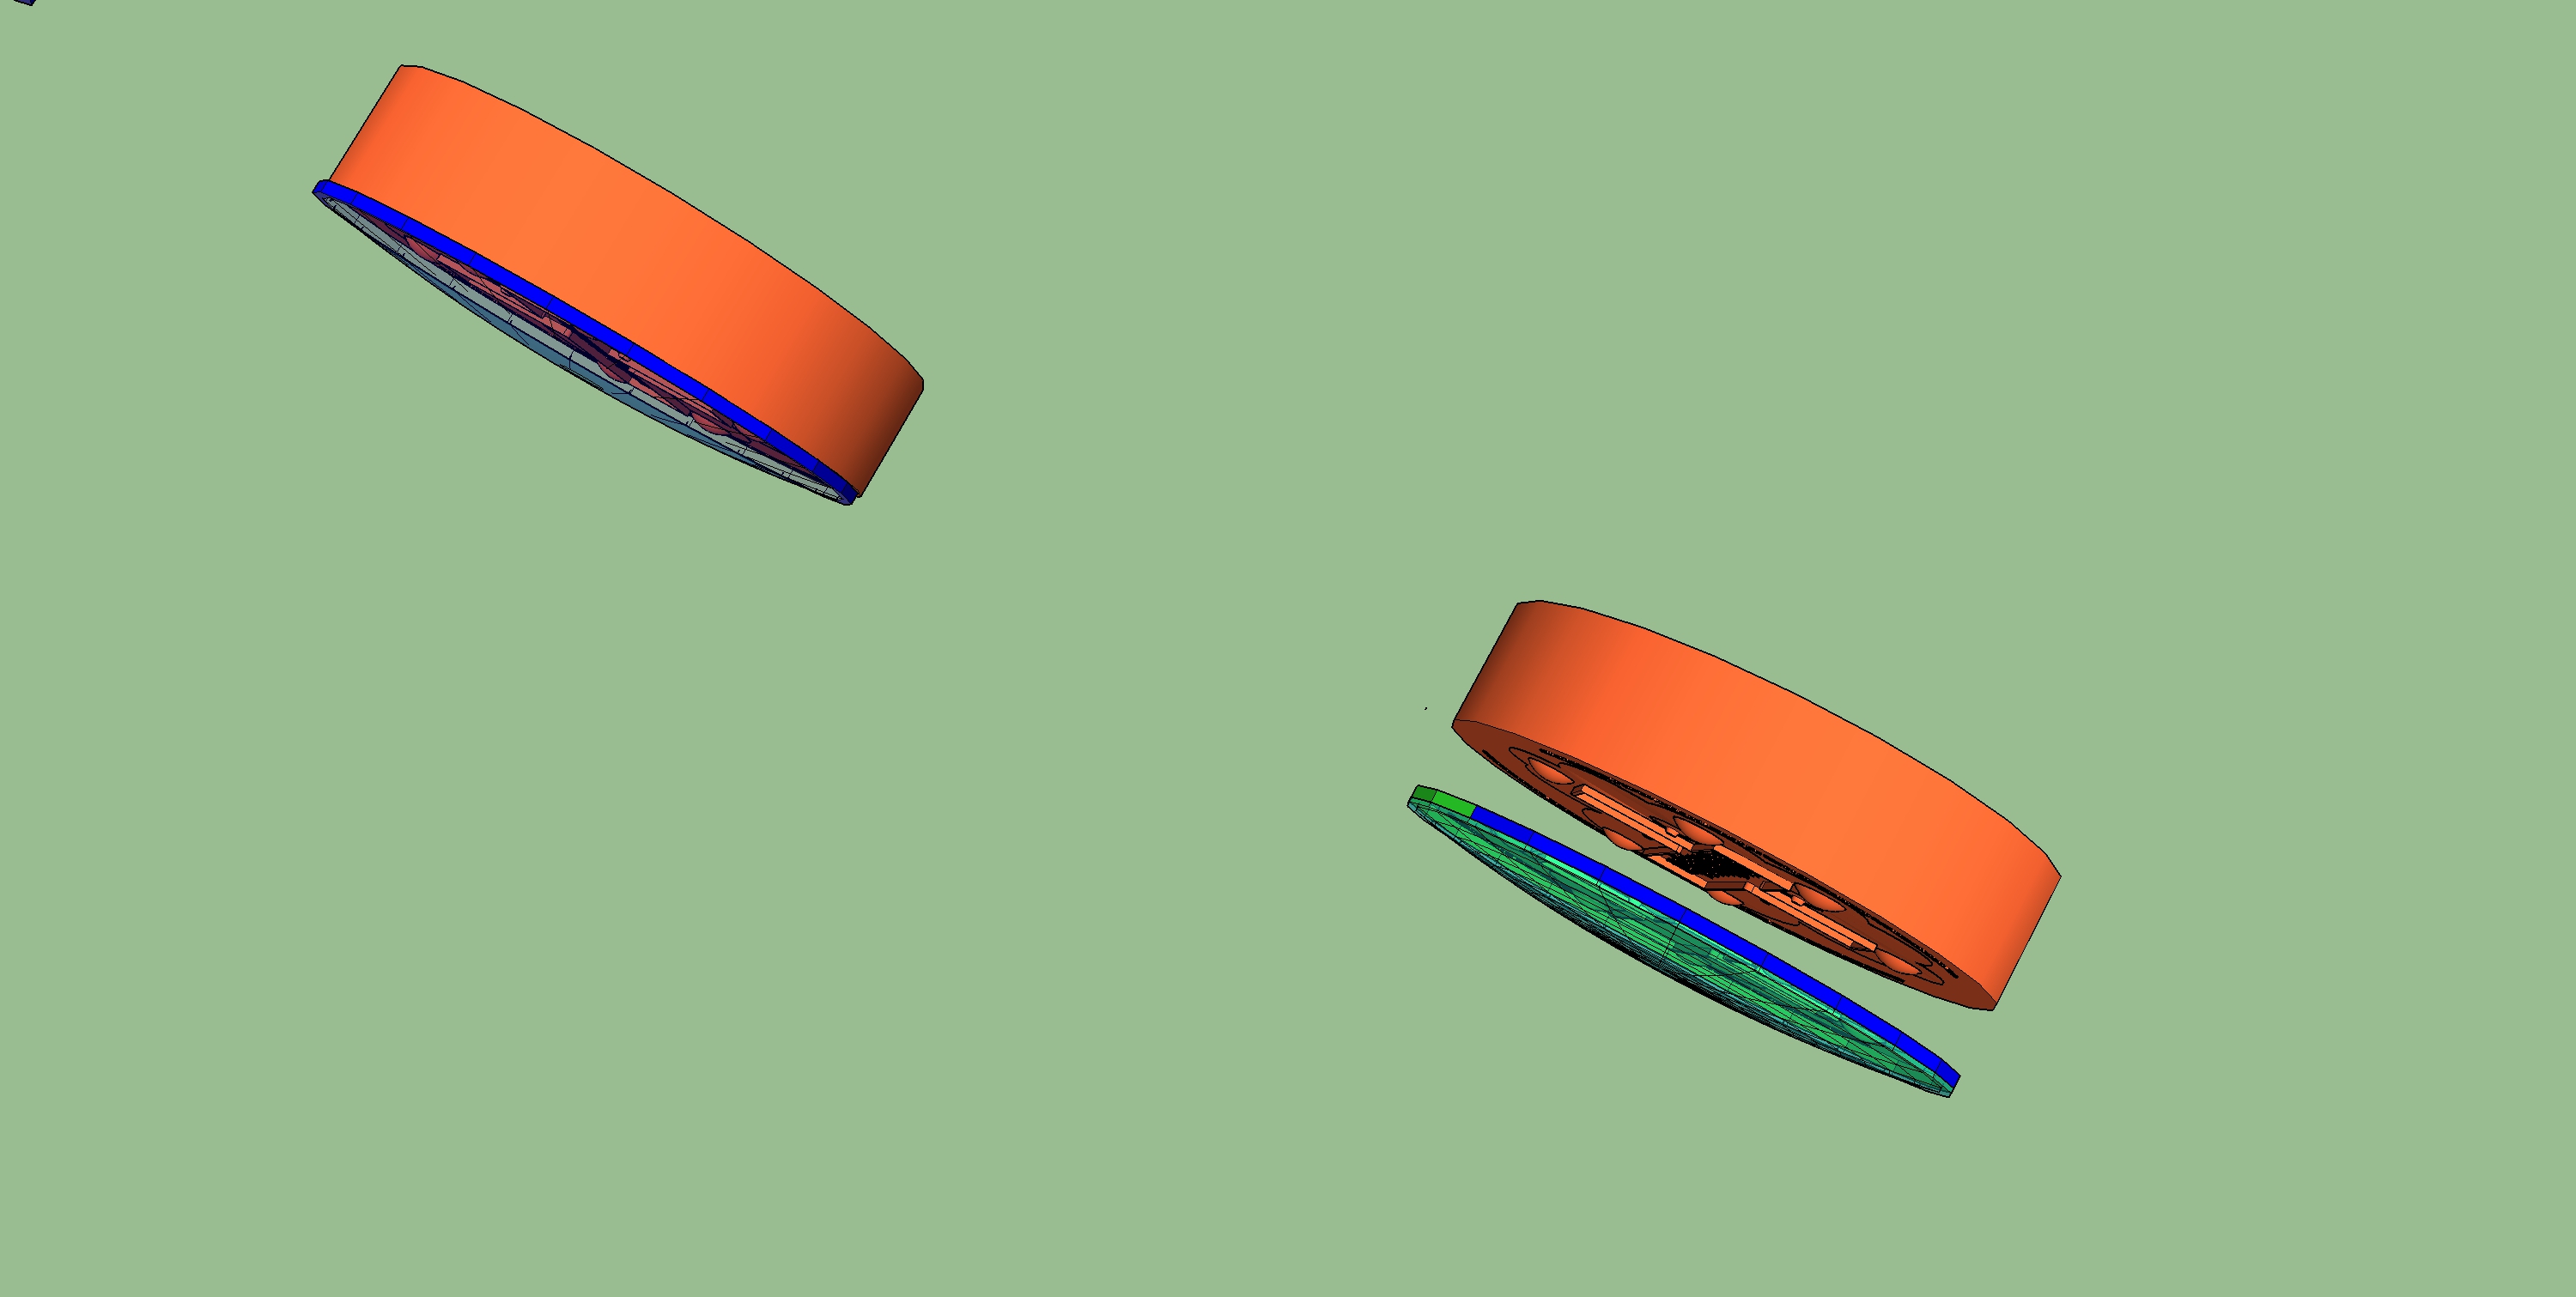
Alright, the whole printing is a set of discs held together against each other. The item that holds them together is the rim that goes around the outside of the printing. Let’s back the rim off.
If you will enlarge the view, you will see that three discs remain when you pull the rim back. There is a central support disc (it is made of tungsten), and there is a disc of platinum on each side of this central disc. So let’s pull the tungsten disc back.

Now I am going to begin to really concentrate on the diamond side, so as I pull the platinum disc back for the diamond side, you will notice (as if by magic), that the platinum disc for the ruby side is just gone. Well, that’s because we are drilling down onto the construction details of the diamond side, so I just “disappeared” anything related to the ruby side. (except for the rubies, mostly because I think they just look cool, and I really preferred them in the pictures, so for the most part, you’ll notice that the rubies are sort of photobombing all the pictures, these things happen)
So let’s pull the platinum back
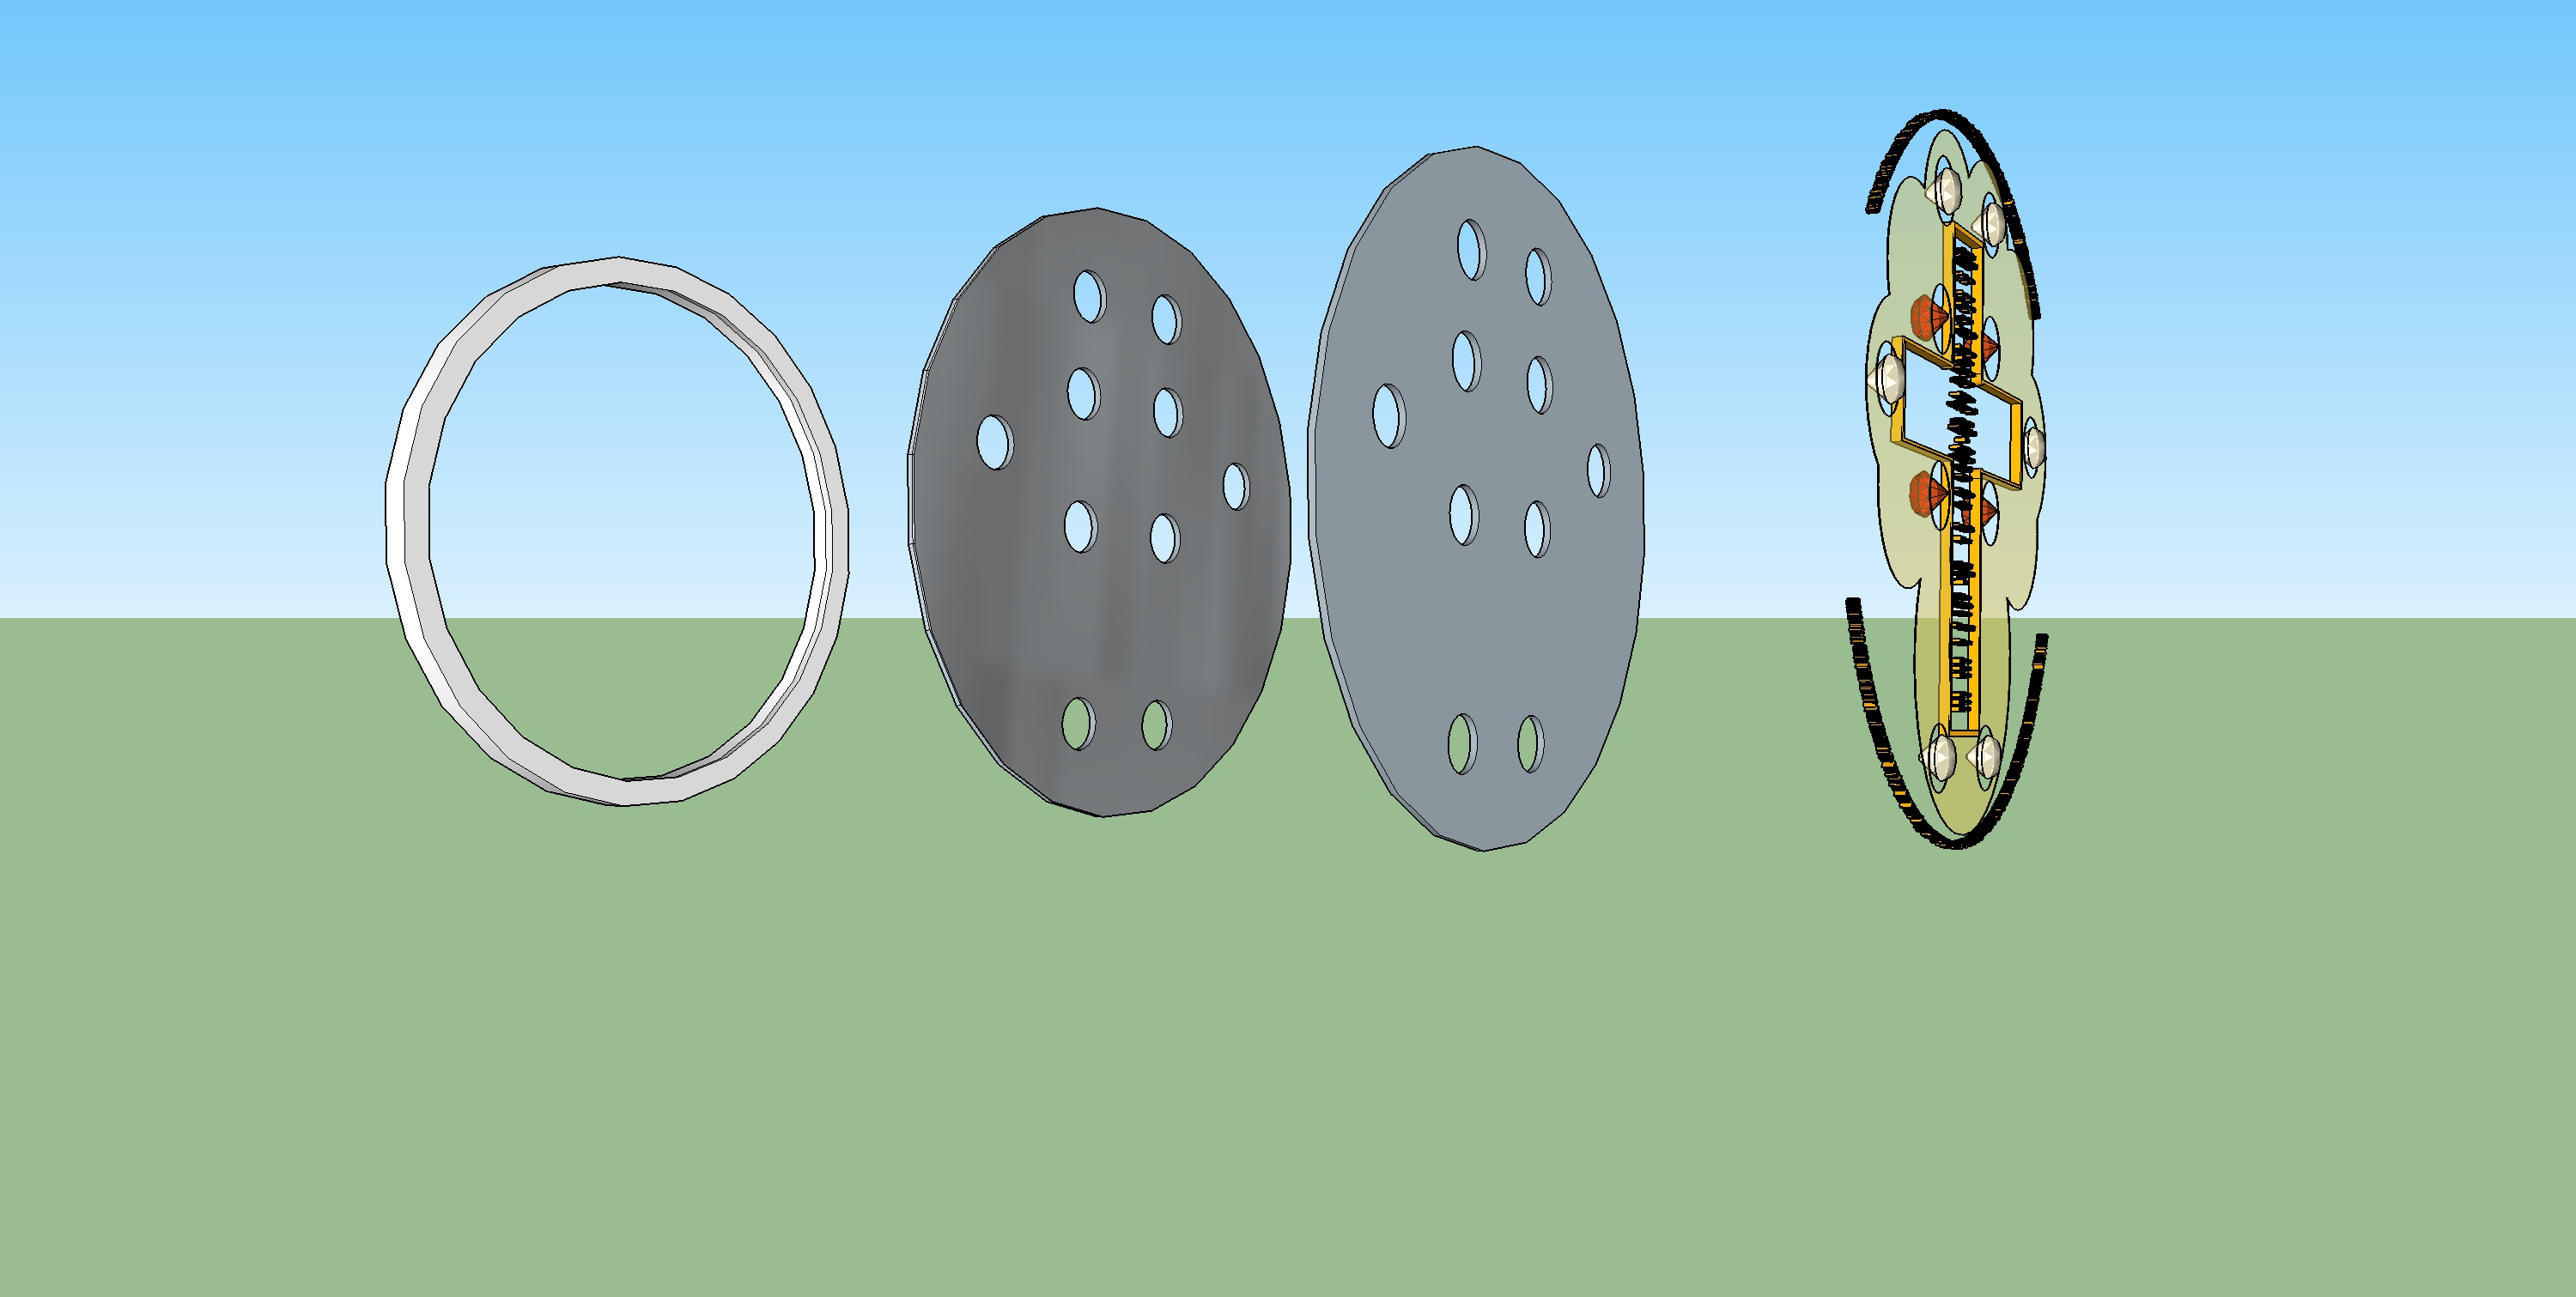
In the actual printing, this platinum layer is 3D printed onto the surface of the tungsten central support disc. The outer surface of this platinum is brought to a surface smoothness (in the 0-1 micron level) that makes this outer surface a “mirror finish”, it reflects light back exactly as would a very high quality mirror. I need to put this platinum layer back onto the tungsten disc.

I am going to make a diversion here because I feel it makes this printing much easier to visualize and understand if I do this diversion.
It involves moving some more parts of the printing down onto the surface of the platinum.
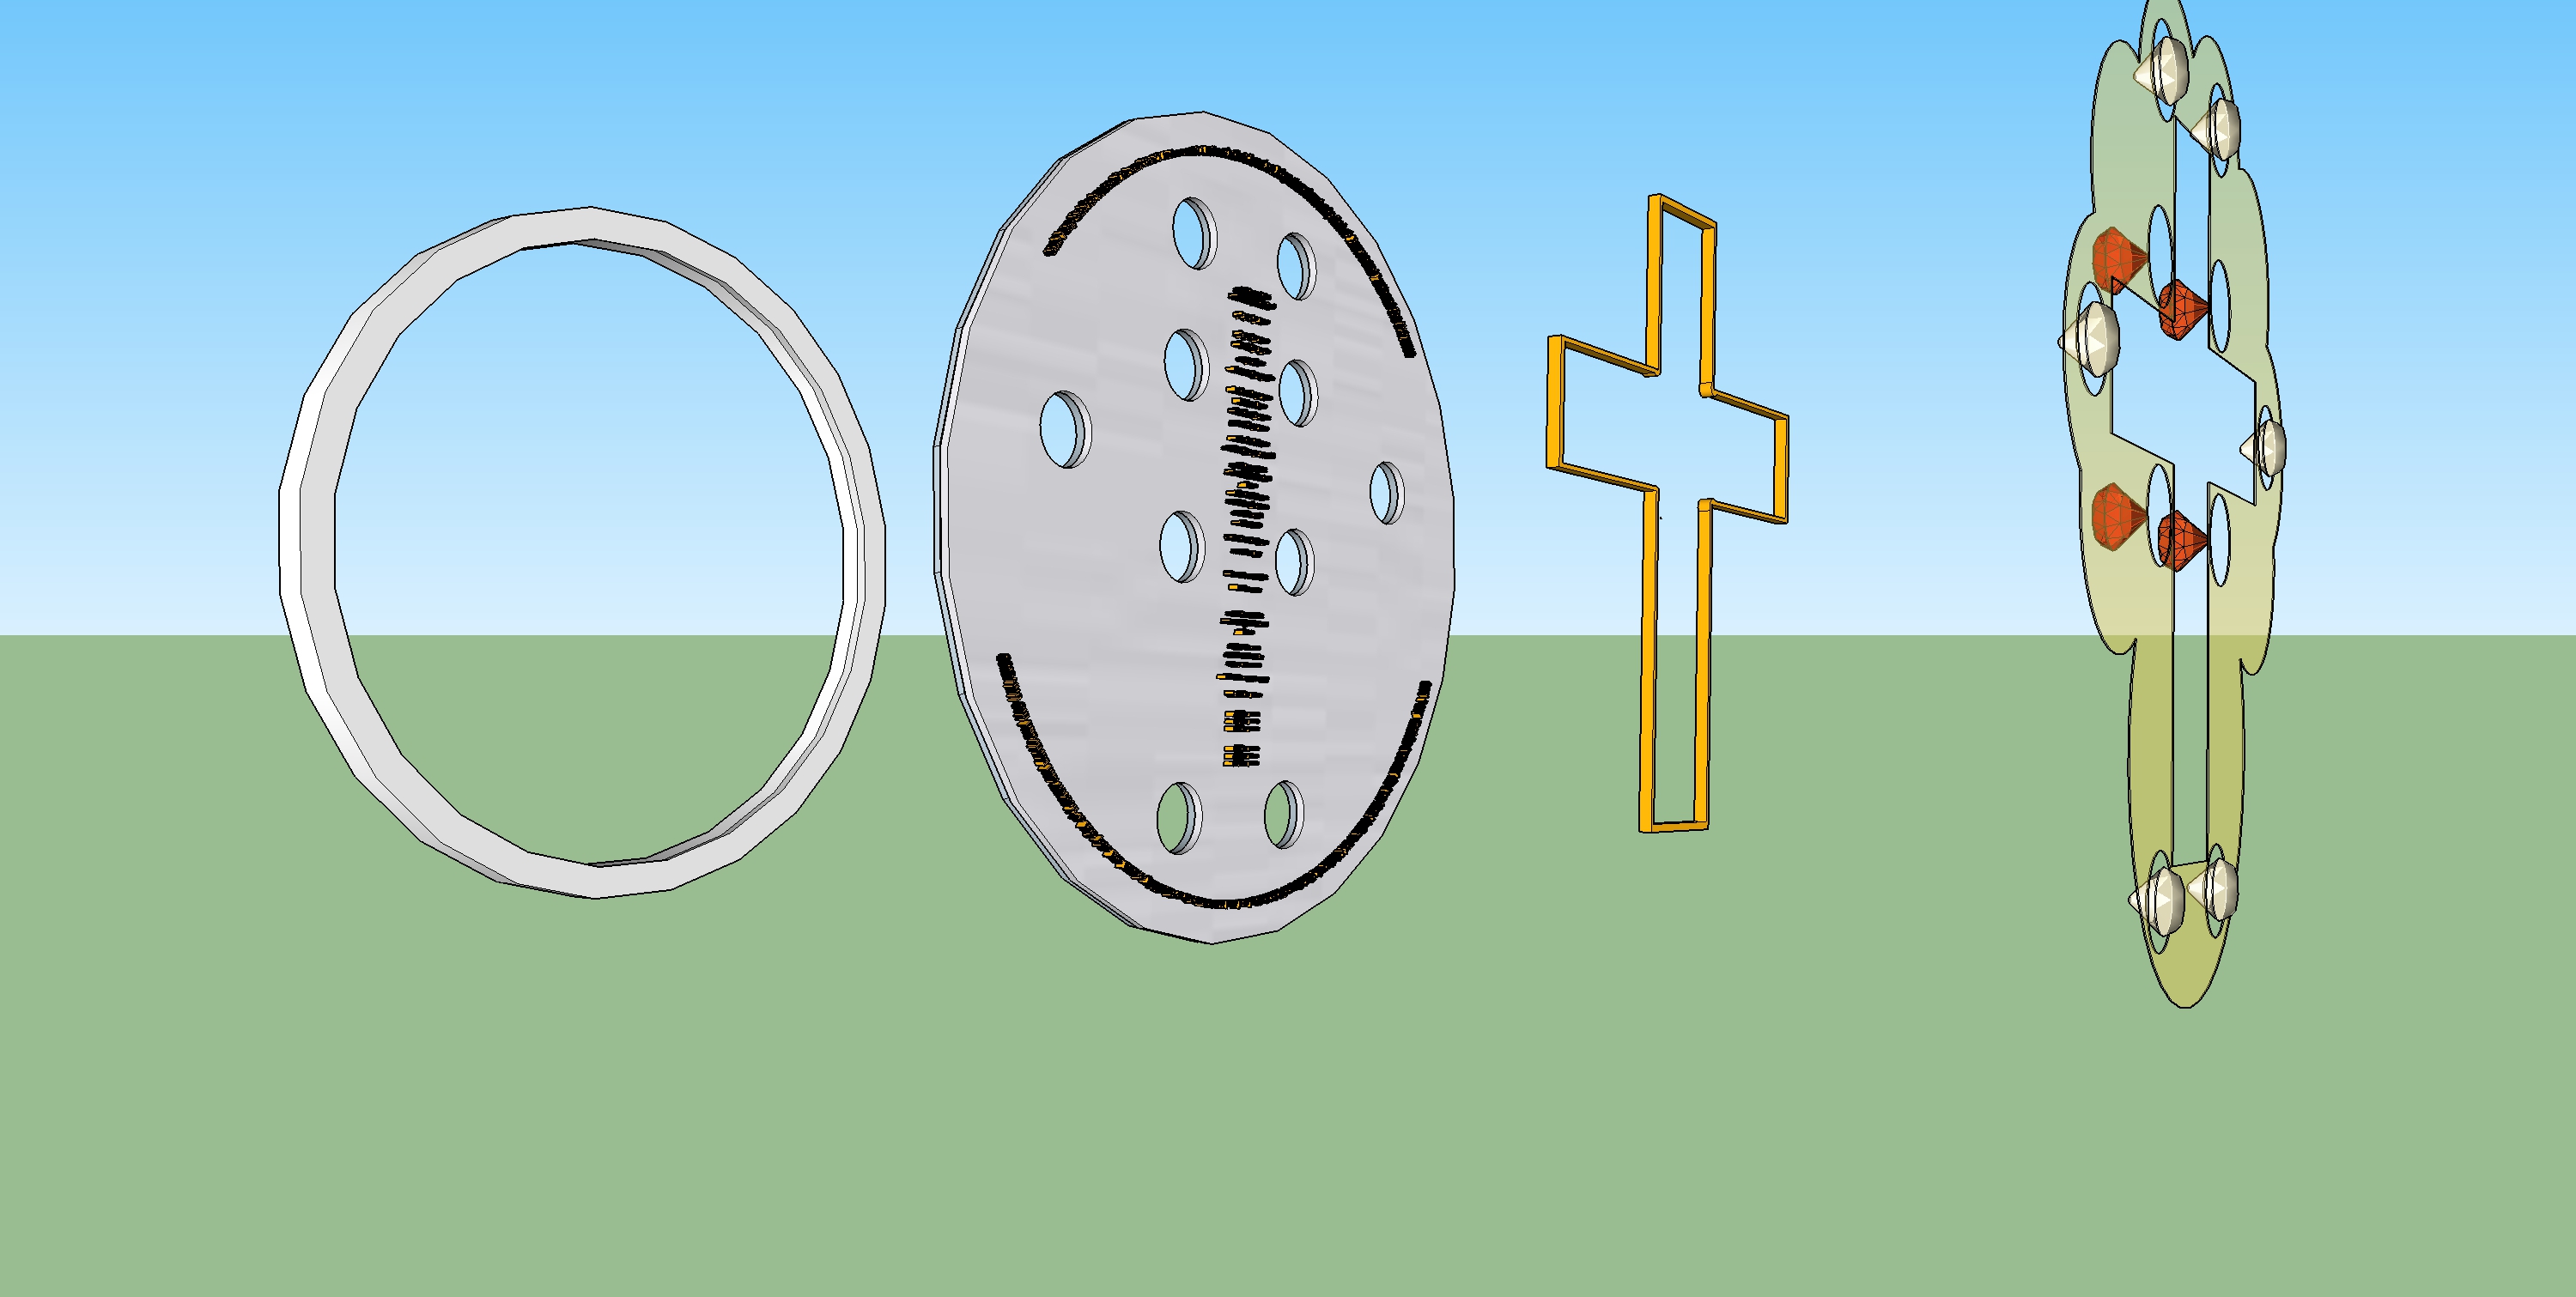
Here I’ve taken the letters (words) and moved them over. There are words around the periphery of the printing and words inside the cross. You can see that the back-most edge of these words is placed directly up against the mirror surface of the platinum.

I’ll move the cross in next.
There is a layer of color that surrounds the cross to give emphasis to the effect of the turning prayer that energy is being radiated out away into the Universe. This layer of color is created by finding a set of sapphires with the proper yellow-golden color that represents this energy going out to all of the Universe and grinding these sapphires into a powder. This powder is then 3D printed into place. This melts together all the sapphire crystals of the powder into one smooth continuous thin layer of crystalline sapphire of the color desired. This color area is so thin that it is actually optically translucent. Reflections from the mirror finish platinum surface behind this color layer would be visible.
The color area gets moved in next.
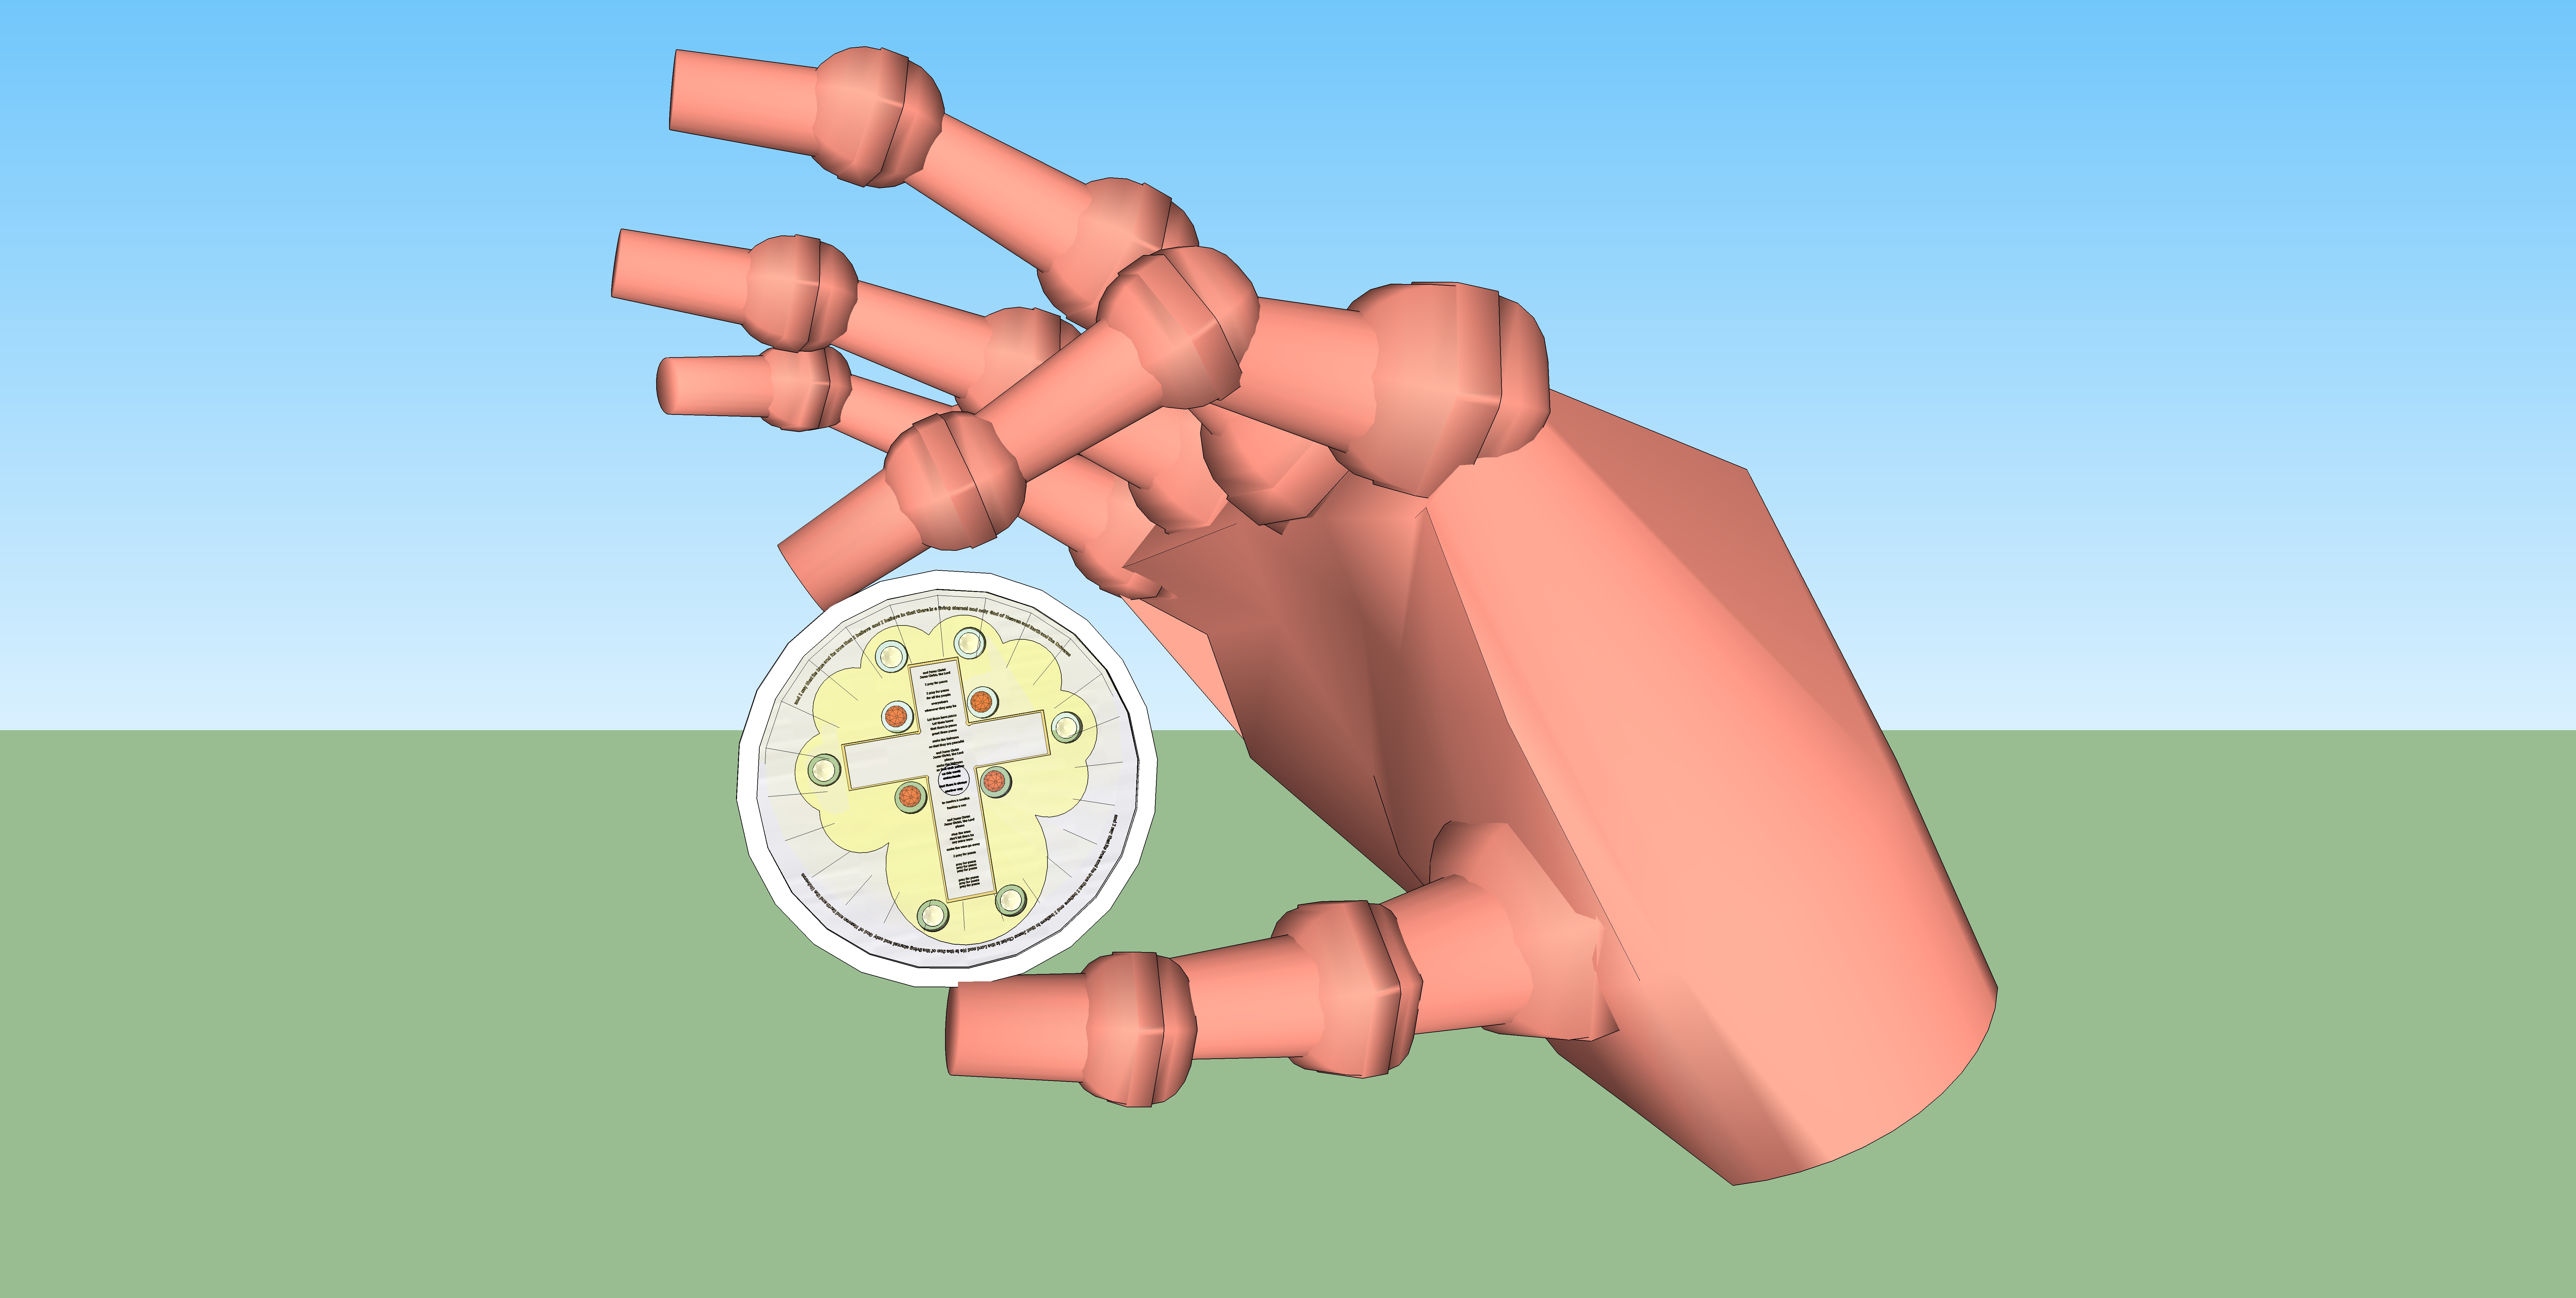
And finally, there are gemstones present in the printing. If you look closely at the printing, there are holes in the tungsten central disc and these holes line up with corresponding holes in the platinum layers. The gemstones reside in the spaces created by lining these holes up like this. The gemstones are slightly longer than the space created by the holes in the discs, so that if the sapphire cover lenses were set flush with the platinum, then the cover lenses would push on the gemstones. You should also wonder out loud, well, “Wouldn’t the sapphire cover lenses push down on the letters and the cross too?” Yes, its true, there would be a space conflict as this is currently described, so something must be done because the sapphire and the letters and the cross and the color area, and the gemstones cannot all exist in the same space.
Here’s where the diversion comes in. I am showing all these three dimensional items as present with their backs up against the platinum, and (I think) for most people the image would be that somehow these structures are attached to, or stuck to, or glued to, or are somehow affected by their contact with the platinum surface that they are touching.
This concept, however, is really a diversion. None of these structures is physically attached or glued to the platinum. These structures are created with micro 3D direct metal printing techniques, there are no organics present and there is no glue. I do not believe that gold metal set in place by micro 3D direct metal printing techniques would attach itself to platinum. The color area cannot be attached by micro 3D direct metal printing processes because the color area is created using a powder of sapphire, and the melting point of sapphire is greater than the melting point of platinum. The problem is that, if one is using micro 3D metal (or ceramic) printing processes to melt the color area sapphire powder into place onto the platinum, then the temperature requirements for melting sapphire powder which are required by these 3D printing processes would burn holes in the platinum.
Let’s go back to the space question that popped up, I feel most everyone would be asking “So….how are you going to get that sapphire cover lens to sit flush on the platinum if you have all these things sticking up out of the platinum?”
The only feasible answer is that there must be depressions in the sapphire cover where these depressions are just exactly the correct shape, depth, and location that all the items sticking up out of the platinum would stick up into corresponding depressions in the sapphire.
Mathematically and mechanically, this concept of matching corresponding depressions in the sapphire cover would solve the problem, from a practical viewpoint it is just not feasible. At the sizes of items involved, there is no economically feasible method to place those items on the platinum and create those depressions in the sapphire face with an accuracy of shape and location that is sufficient for everything to “match up”.
The solution is to look at the problem from another angle. It is possible to create depressions in the planar face of the sapphire lens cover, where these depressions have the shape and location to account for all the parts of the printing including the letters, the cross, the color layer, and the gemstones.
Once these depressions are created in the sapphire lens face, then they can be filled in with gold (for the letters and the cross) and sapphire powder (for the color area), and left empty (for the portions of the gemstones that protrude).
The process for filling in these depressions with gold or platinum powder will the use of micro 3D direct metal printing techniques.
So here is the diversion, while mentally it seems as if the back face of all these structures is affixed to the platinum, what is actually true is that the front face, and all the sides except for the back side are affixed to corresponding depressions in the planar face of the (convex-planar) sapphire lens cover. Whew !
I’m sure everyone is just thinking “Hmmmm…..this seems like you just converted one crazy impossible unbelievably aggravating mechanical problem into simply another crazy impossible equally aggravating different mechanical problem.”
“But,” I will reply, “hold on a second, you can create depressions in sapphire.”
Sapphire is a ceramic and its properties are affected by its temperature. Sapphire (like many other ceramics, and like many other materials) has a curve that can be discovered in the physical chemistry world. This curve is the brittle-ductile curve. What one sees with brittle-ductile curves is that materials respond differently to a physical deformation type stress depending on their temperature. For many ceramics, if they are cold enough, then their response to physical deformation stress is that they are essentially brittle, and they respond by shattering or cracking. However, when heated up into their ductile form, then they respond to physical deformations stress by simply “easing” their shape in a manner to relieve the deformation stress.
With sapphire, this brittle-ductile transition occurs at about 1500 degrees celsius. So if we heat the sapphire cover lens up to 1500 degress celcius and then push a shaped structure into the sapphire, then the sapphire will be ductile and will move itself out of the way of the deforming structure.
Obviously, we aren’t going to deform anything that is heated up to 1500 degrees celsius with just whatever we want to use. We will need to deform the sapphire with a solid structure that is stable even if it is at a temperature of 1500 degrees celsius.
Well, there are a bunch of materials that are stable at these temperatures, so we just need to see which material we want to use. It is my thought to use boron nitride. Boron nitride is a hard, polishable, solid that would be unaffected in its mechanical properties if it was at these temperatures. In addition, boron nitride is readily available in powder form of a purity and physical uniformity that it can be used for micro 3D direct metal printing (although, this would technically be micro 3D direct ceramic printing, since boron nitride is a ceramic).
And another very desirable feature of boron nitride is that it has essentially zero affinity or stickiness to molten glasses or ceramics. This means that if we made a die face of boron nitride where this die face contained all the structures we wanted (letters, cross, a protrusion that would create space for the color area, and a protrusion that would create space for the gemstones to project out into), then we could press this die face into the planar side of the sapphire cover lens and we would leave behind a series of depressions in the sapphire of all that we wanted. Double WHEW !!
My feeling is that the sapphire cover lens would need to be brought up to 1500 degrees celsius in one oven, then lifted up and transferred to another oven where this other oven is kept at about 1300 degrees celsius. The boron nitride die press is also present in this 1300 degree oven, which means that the temperature of the working ends of this die press would be 13oo degrees celsius.
What would happen is that when the end of the die press first contacts the sapphire, the temperature of the sapphire would still be 1500 degrees celsius. The temperature of the die end is 1300 degrees celsius, however. The effect would be that the die end sinks into the sapphire and creates the depressions that we want, but the die end would also begin the process of cooling the sapphire. Referring to the brittle-ductile curve of sapphire, we see that as the sapphire cools below its brittle-ductile temperature transition, then the depressions will “set up” and become stable and present in the sapphire.
At this point, the boron nitride die parts are withdrawn (which boron nitride will do, since it does not stick to ceramics) and the sapphire now exists as a strong stable solid with the depressions in place.
The sapphire is allowed to cool below the melting point of gold. The sapphire powder of the appropriate color is laid into the color area, and then micro 3D direct ceramic printing techniques are used to melt in the color layer in its corresponding depression in the sapphire lens cover. After the color area is in, cool, and stable, then gold is micro 3D direct metal printed into the depressions of the sapphire cover lens that are present for the gold letters and cross.
Yay….done
Back to some pictures. First I will do a transition of the sapphire cover lens to run up its color and its opacity so everyone can see what is happening.
What follows is a sequence of visual manipulations of the optical characteristics of the sapphire lens. Remember, (even though I promised not to beat on this topic again), the actual sapphire cover lens starts out transparent and remains transparent through all of these steps, and I have added color and opacity because its a pretty stale presentation for me to tell you what I am doing to something that is transparent, invisible, and you can’t see it.
So, Sequence #1 below, beginning with the lens on the far left side, the lens has some blue color and a little opacity. Moving to the images to the right, the opacity is increased somewhat. Then I used the “softening” feature of Sketchup to lay on some visualization lines onto the various surfaces of the lens.

In Sequence #2 below, I added separate colors to the edges. And these edge colors have a lot of opacity.
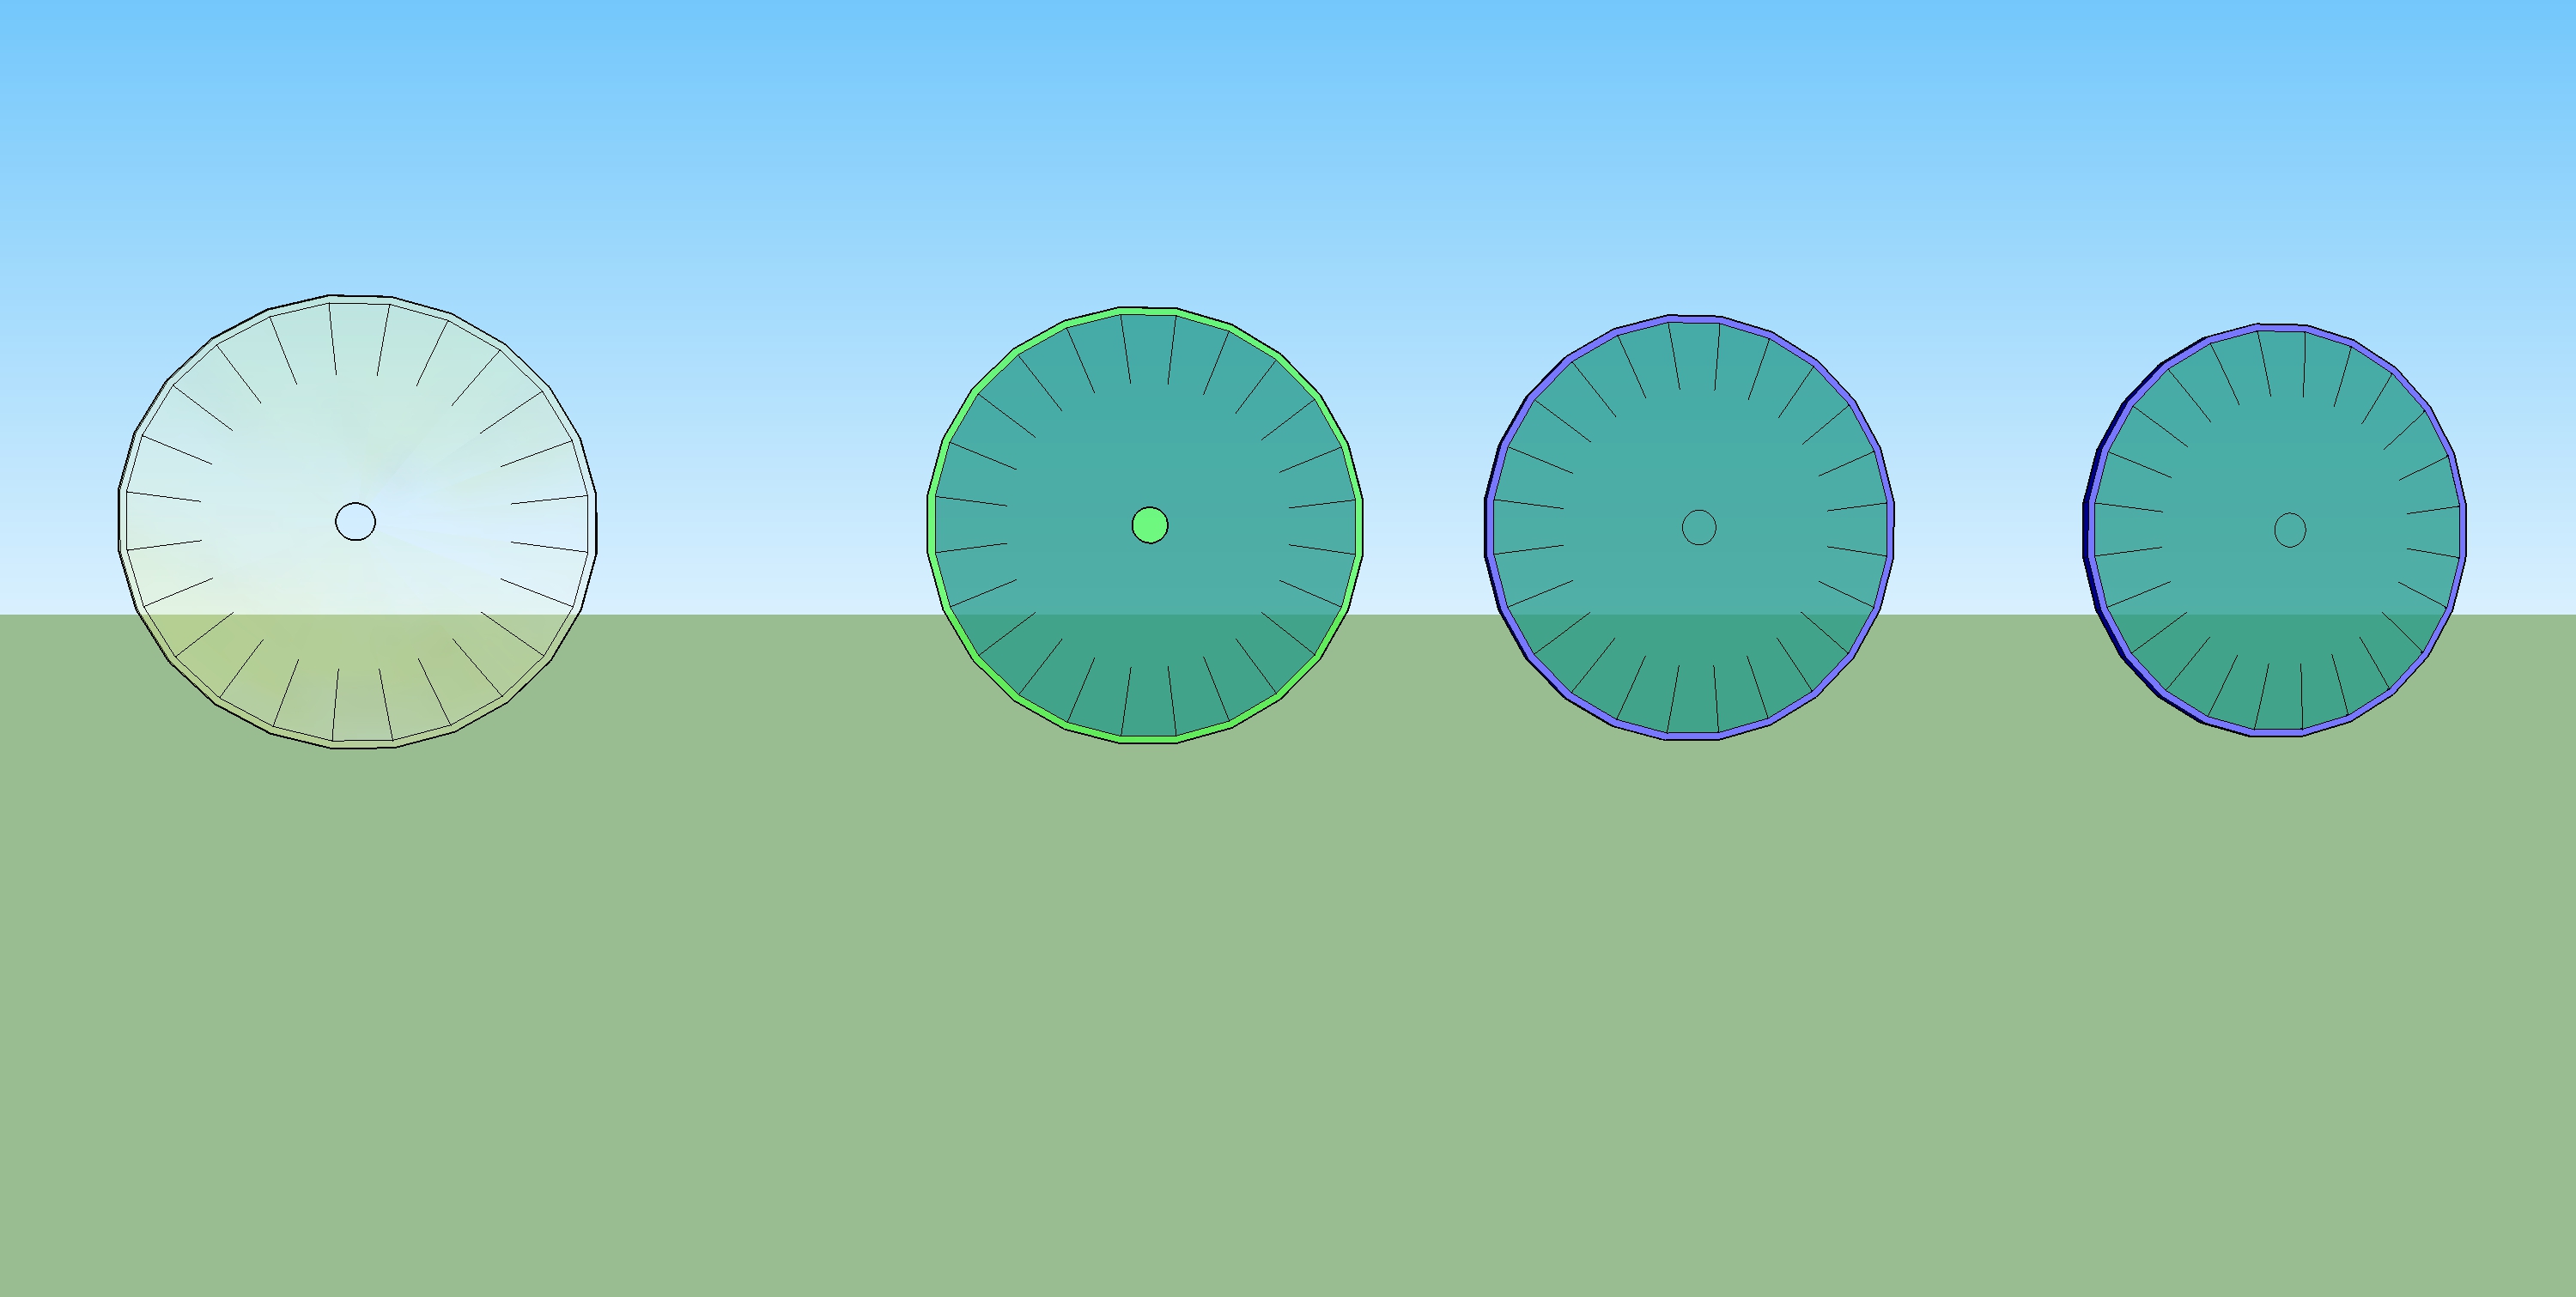
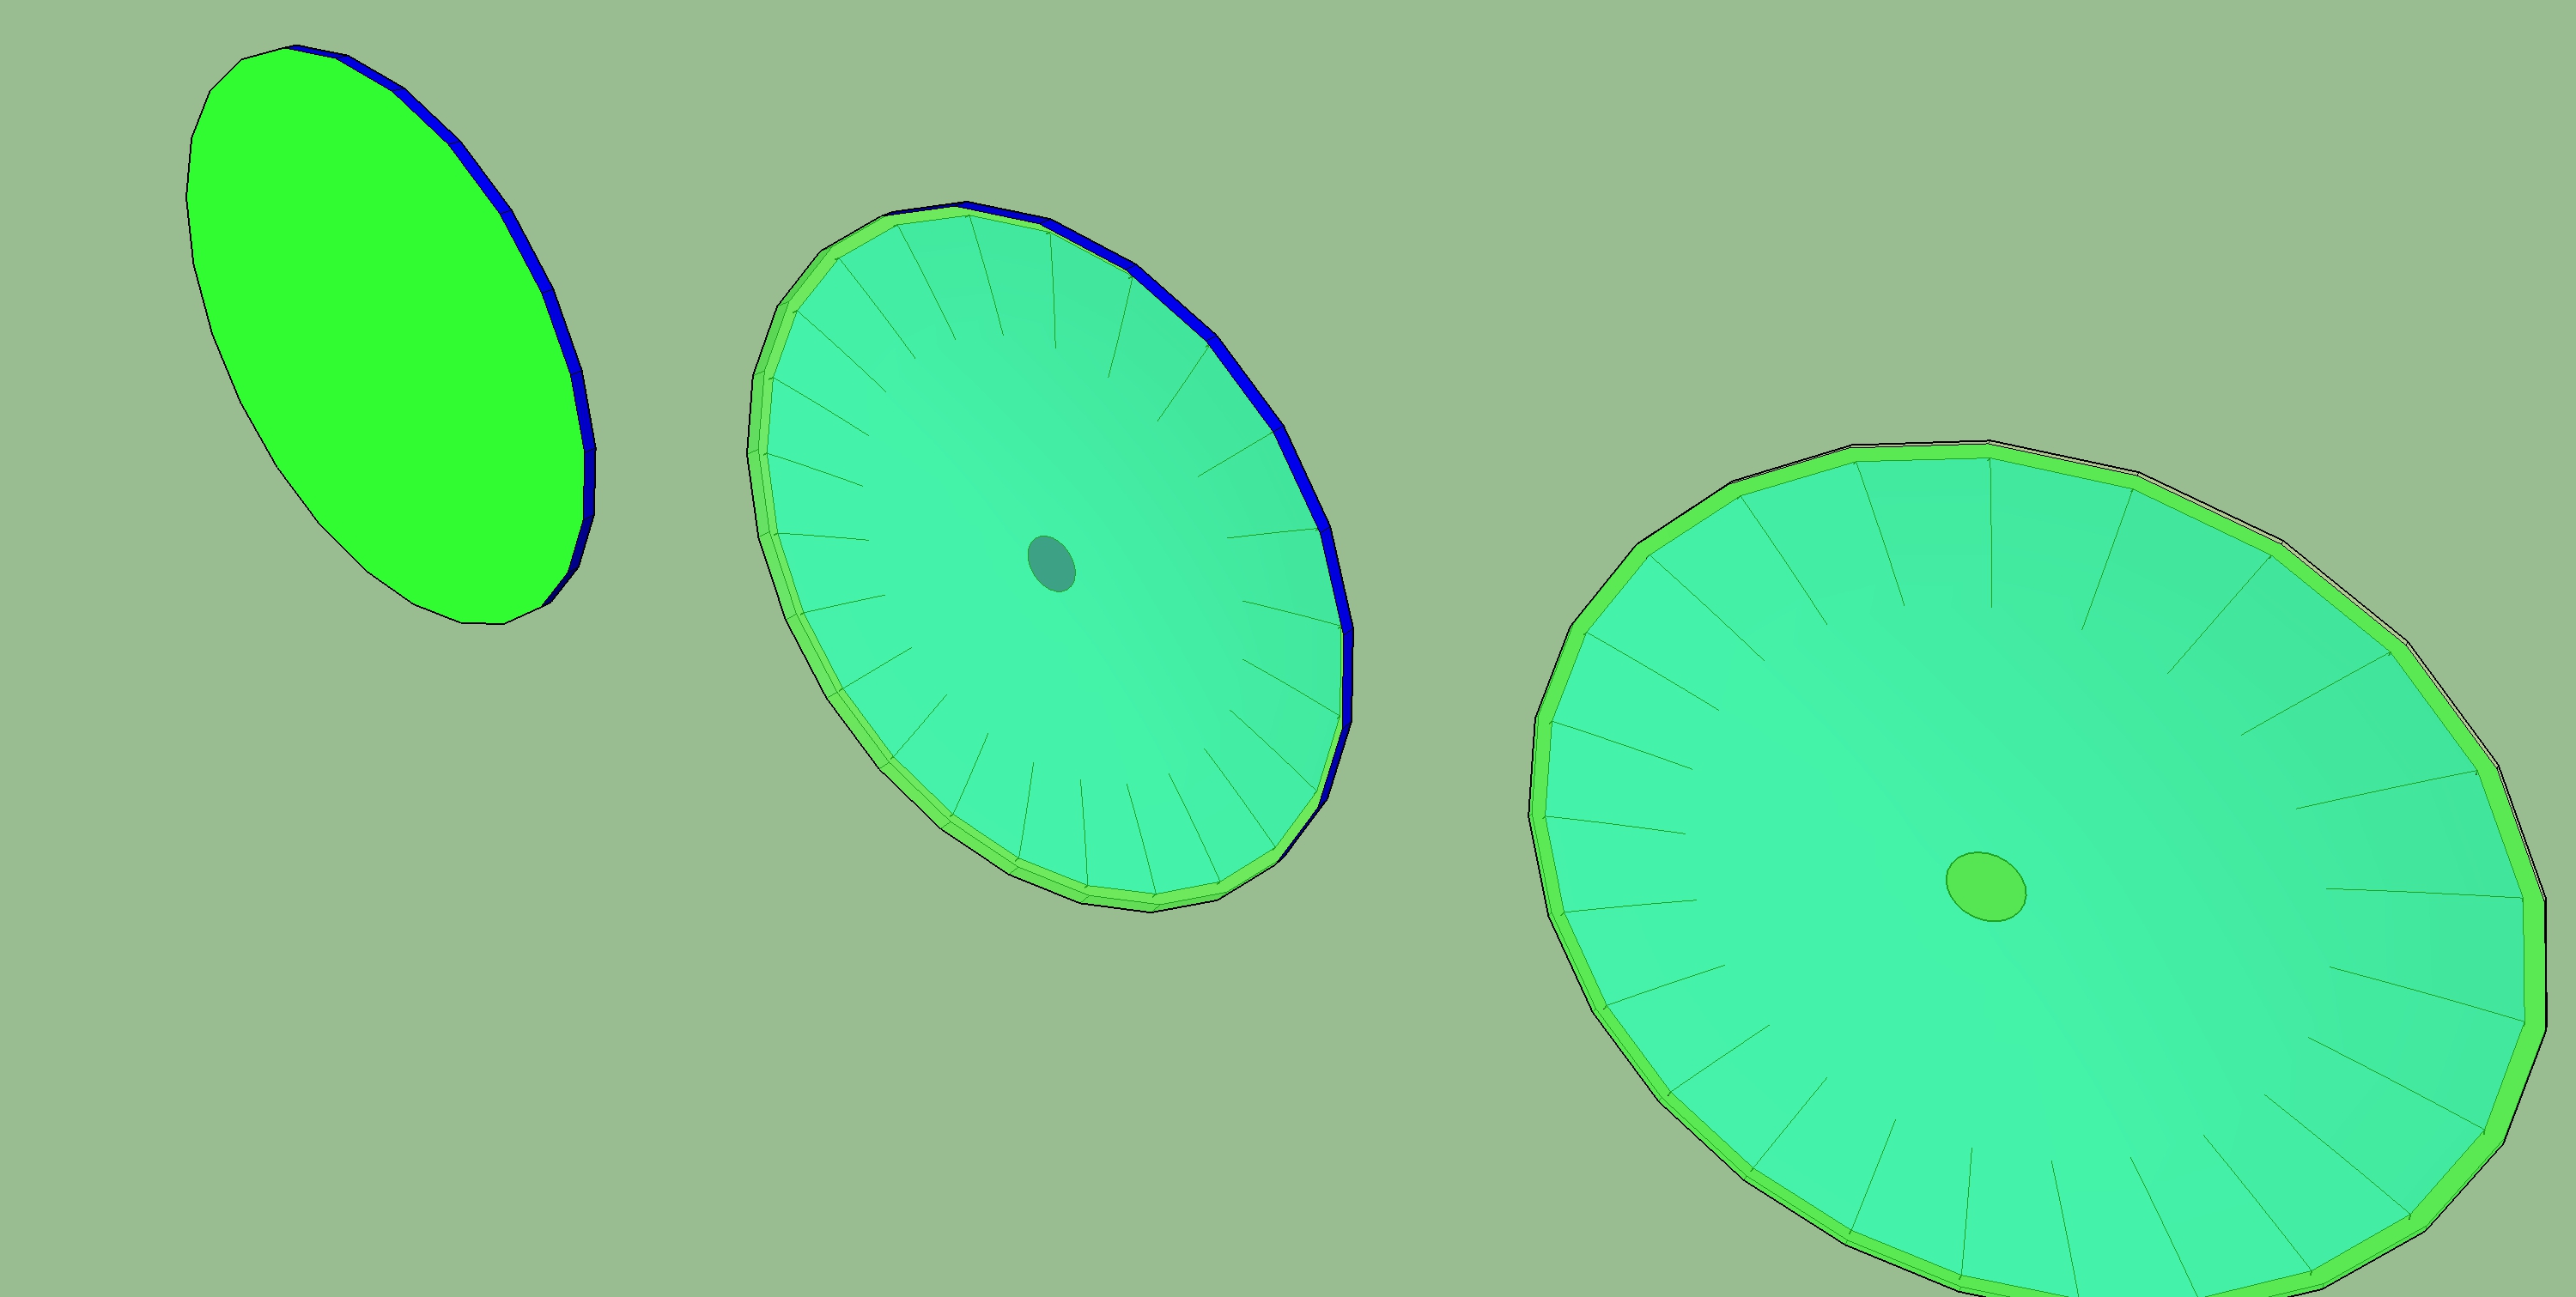
Here, in Sequence #3, I’ve turned the lens a little so you can see more of it.
Notice that the front (convex) and back (planar) surfaces of the lens still have low enough opacity that you can see through the lens. Notice also that Sketchup has placed a small circle at the center of the convex face of the lens. So remember, whenever you see that circle, then its showing you where is the convex face of the cover lens, and where is the geometric center of this face.
In Sequence #4 below, I have introduced the boron nitride die. I colored it orange because I wanted it to be really different from anything else in the printing, particularly anything in the lens, so you won’t get mixed up. Also, out in Google land, this color is frequently given to boron items. Notice that I am showing the lens moving its flat planar side toward the boron nitride die face.
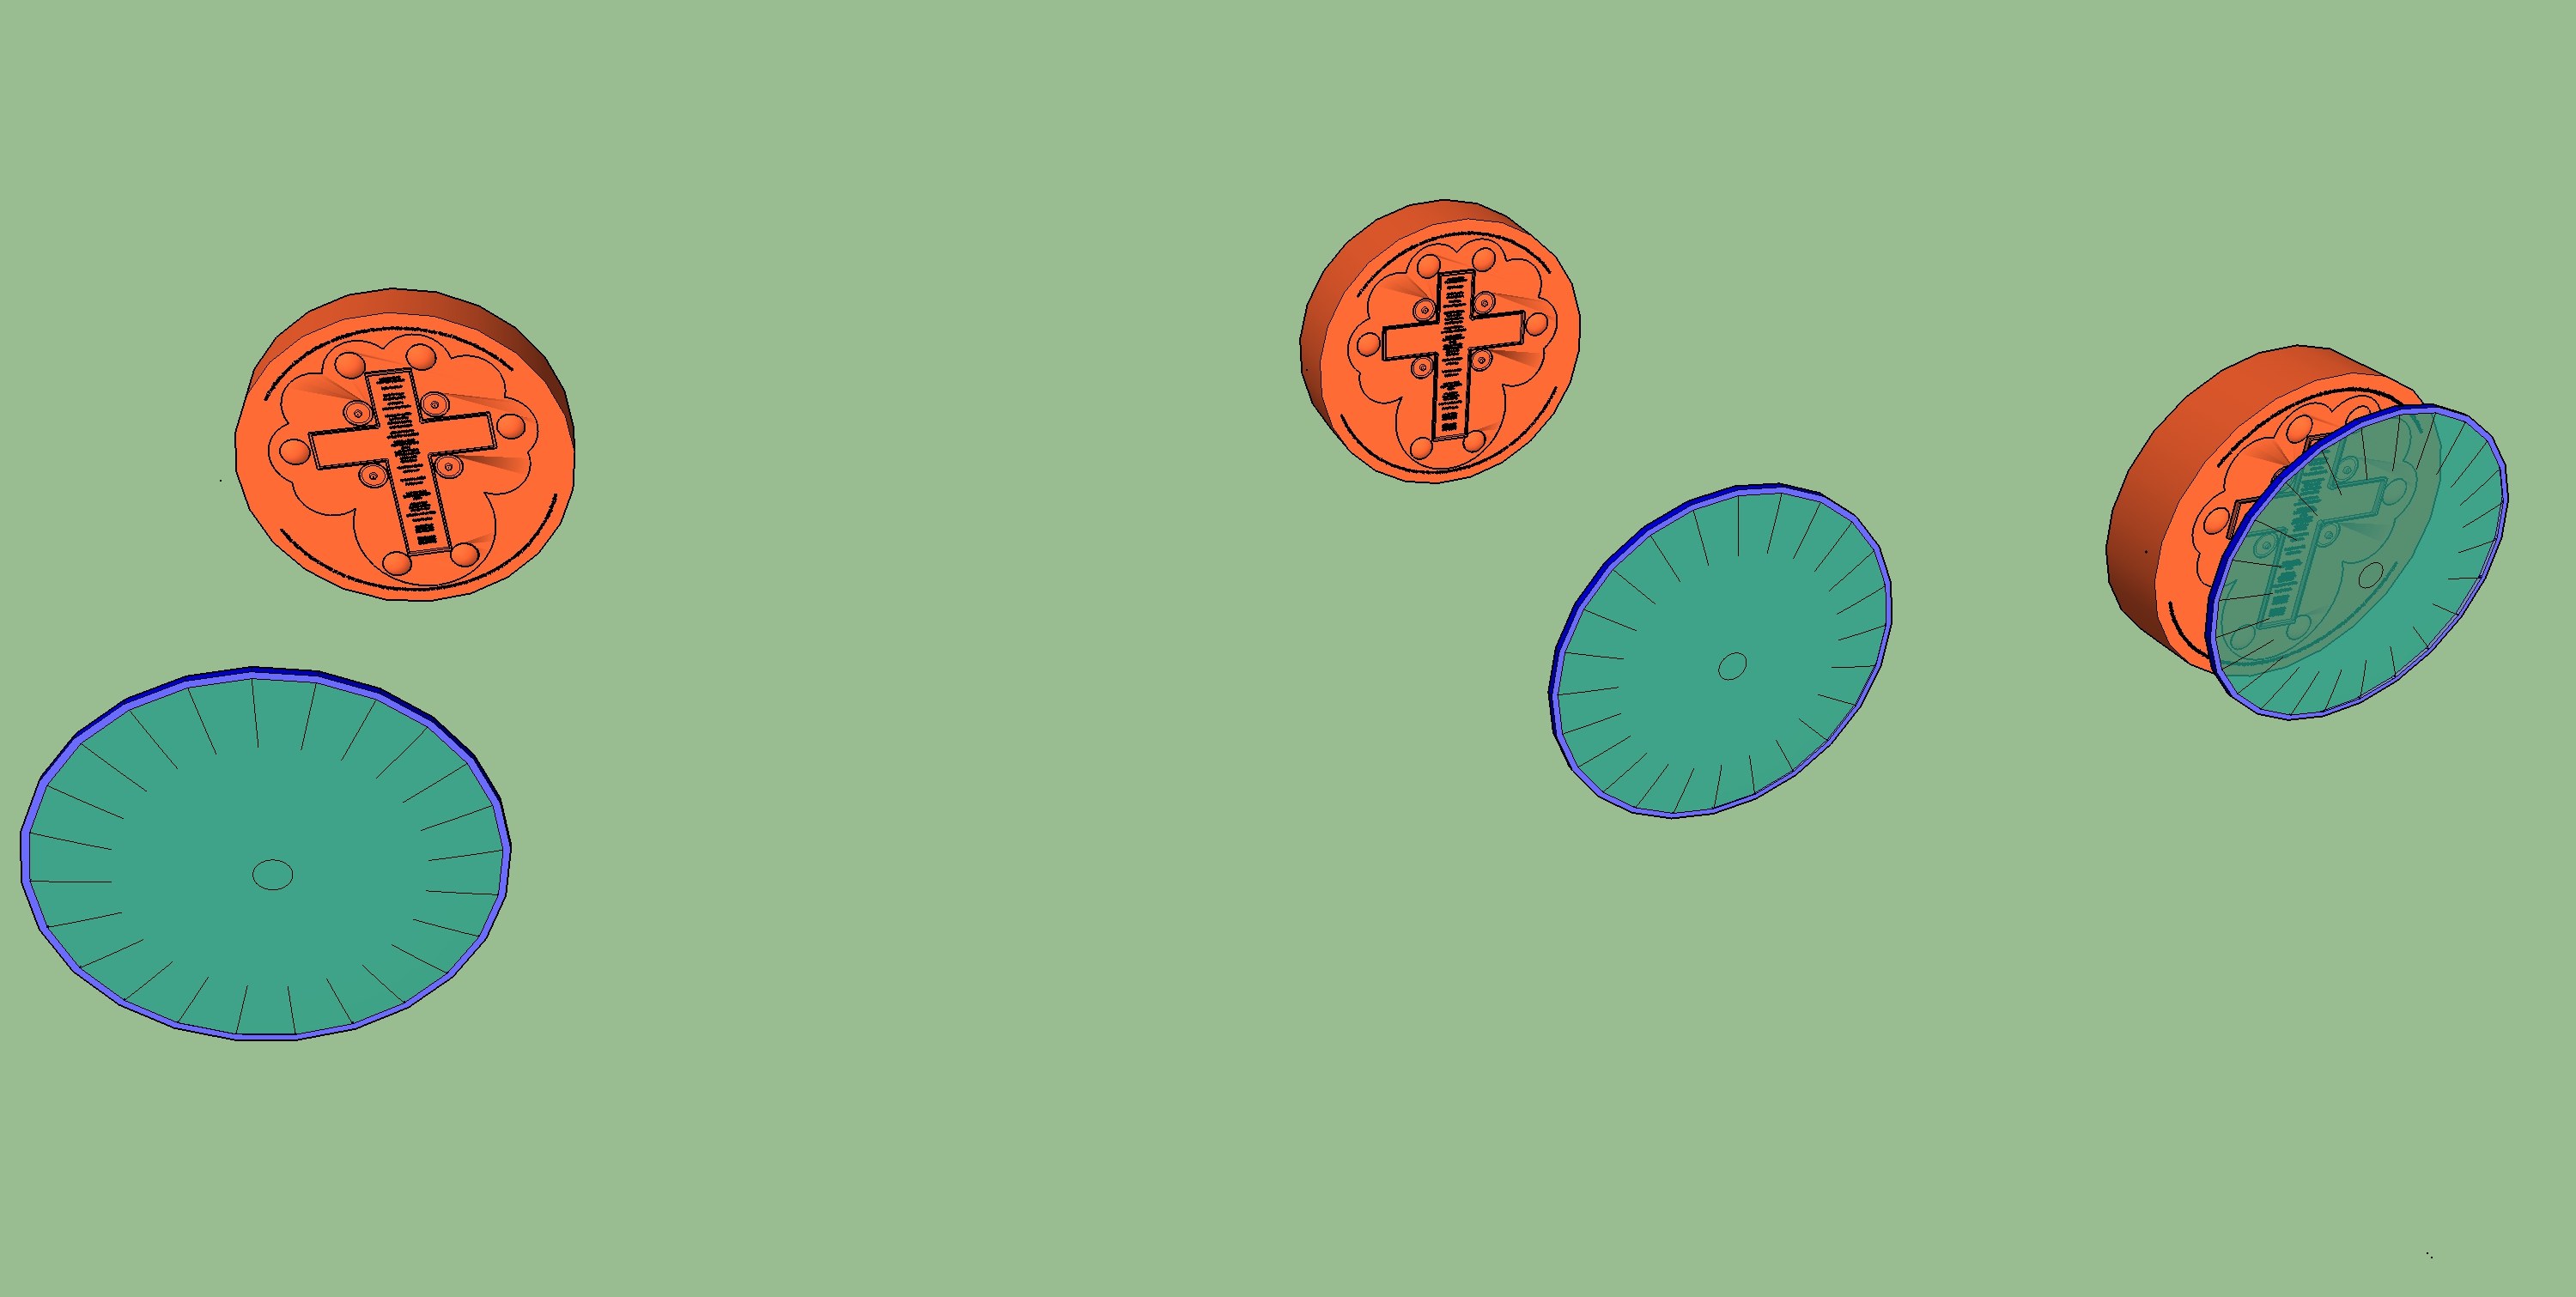
In Sequence #5 below, the boron nitride die face makes contact with the planar face of the lens. This would be happening with the lens initially at 1500 degrees celsius as discussed above.
Notice, although it is not shown, this boron nitride die creates depressions specific for the diamond side of the printing. There would be another boron nitride die set up to make the depressions for the ruby side of the printing. Notice also, that the die face had protrusions and these protrusions push into the softened planar surface of the sapphire and create depressions in the sapphire. There will be created depressions for the color layer, the cross, the letters, and the gemstones.
Notice that the gemstones are not symmetrical on their long axes. One end of these gemstones is broad flat expansive, the other end is more sharp and pointed. If you study the protrusions in the die that make space areas in the sapphire for the gemstones, that there is a broad round flat type area of space created for the broad end of the gemstones. There is a smaller cone-like protrusion of the die that makes a smaller cup-like corresponding space area in the sapphire. This smaller cup-like area is present to be a resting zone for the more sharp end of the gemstones.
These considerations would then suggest that I should ask you to notice that on the diamond side of the printing, this is the side where the broad flat end of the diamonds shows, so the diamond side die has protrusions for these ends of the diamonds, and the diamond side die has the more sharp pointed protrusions for the rubies. This diamond side die, then, would have 6 broad flat protrusions for the diamonds, and 4 sharp protrusions for the sharp ends of the rubies.
I am sure you would understand that the die for the ruby end would be a corresponding variation of this in the sense that the ruby side die would have 4 broad flat protrusions for the broad end of the 4 rubies, and would have 6 of the more sharp protrusions to hold the sharp more pointed ends of the 6 diamonds.
In Sequence #6 below, I have a more birds-eye view to show that the die has made contact with the planar surface of the sapphire lens, and now the die is starting to move away, leaving behind depressions in the sapphire lens cover.
As we can see in Sequence #7 below, the die is moved on away from the sapphire lens, and then we can see the sapphire lens from the back, where we are looking at its planar surface, and there are depressions in this planar surface.
I will have to add an editor’s note: If you study the sapphire lens closely, you will see that there is not present depressions for all of the letters. I just have to confess that I never could get Sketchup to make depressions in the shapes of letters into a solid without me having to do an unbelievable amount of work. I am convinced that its an easy process, I just never could understand it. So, anyway, I decided to put enough depressions of letters in there for you to see how it would work, and in the real printing, then the die would have added depressions for all of the letters, I just wanted this to be Holiday Gift type project, and I didn’t have enough time to either add all these letter depressions or figure out the “easy way” to do it in Sketchup. So there you go.
And by the way, I do have a plan to try to get all this to the 3D Warehouse area so you can download these drawing files and “look around” at your leisure.
I wish I knew, I can’t seem to get any feeling of just how many drawings I can send to the 3D Warehouse. I’ll try to send these drawings over, we’ll see what happens.
Editor’s note #2: I still have lots of work left on pistonrobot, and if the 3D Warehouse starts limiting how many drawings I can have, then I guess I’ll get these 3D printing drawing files of of the 3D Warehouse site and leave them so they are only available for download at the pistonrobot website.
I am going to try to get these drawing files downloadable at the website, but data vs image files always gets me mixed up and it takes awhile. They might not be here for Christmas, I did try. Anyway, with the 3D drawing program you can zoom around in that final lens area and “see” all the various depressions that would be present on the planar side of the sapphire lens.

The Sequence #8 image below lets us look at the sapphire lens cover from its convex side. And this brings out a point, as I am sure most of you typography, print setting, die maker types would be wondering to yourselves, “Hey, hold on a minute,”…”Aren’t all those structures, those depressions, supposed to be put in the sapphire in reverse order or basically as mirror images, so they will print correctly?”
And the answer to this would be yes, except, the viewer of the printing is “seeing” all this printing work from the front. They are “seeing” it through the transparent convex side of the sapphire cover lens. So, since the depressions are in the backside of the cover lens, then we need to add the depressions in their normal form, not reversed or mirror image.
And, one more time, we aren’t actually going to “see” these depressions at all because they exist in a material that is transparent. What we will “see” is the gold metal that has been micro 3D direct metal printed into these depressions (at least the letter and cross depressions).
We’ll see the color layer in the depression for the color layer, and I should note that this color layer is thin enough that it adds a faint hint of color, but it is so thin that it is actually translucent, and we will see reflections and light effects bouncing off the mirror finish platinum surface that is behind this color area.
And, finally, we won’t see really anything in the spaces that exist for the gemstones, except that we will see the gemstones in these spaces. If the sapphire lens material will maintain enough of its inner optical clarity, the hope is that these gemstones will appear to be simply floating.
Is that a cool effect, or what?

And so, OK, there it is the diamond side.
I have not discussed how the rim will be held in place. It is easy to state how the rim will be put into place because the inside diameter of the rim is just faintly larger than the outside diameter of all the discs of the printing. All the discs of the printing would just slide into the rim.
If you look closely at the central tungsten disc, it has a groove or notch that runs around its circumference. This groove will have a layer of platinum in the groove, placed there via micro 3D direct metal printing techniques. You can also note that the rim has a groove on its inner circumference, and this groove will also have a layer of platinum in it, placed also by micro 3D direct metal printing techniques.
When the rim is in place around the discs, these two layers of platinum ( a platinum layer that runs around the inner circumference of the rim and a platinum layer that runs around the outer circumference of the tungsten central disc), these two platinum layers will be contacting each other.
Using the heat available from the micro 3D direct metal printing processes, these two layers of platinum can be heated to their melting points in a sequential fashion all the way around the circumference, and this would bind the rim to the discs.
Some other thoughts,
It is the Holidays, this was created to be at all times a gift for the Holidays to help bring Happiness and Good Cheer.
This 3D printing project does have a religious theme, which I feel should not create any sort of problem. The purpose was to let people see something that may be possible with 3D micro direct metal/ceramic printing processes. I feel that a discussion of and theoretical demonstration of 3D direct metal printing concepts should not upset anyone, it was never the intent to do this, even though it has a religious theme.
I doubt it has been lost on anyone, that the sequence of construction steps outlined above could be used to form all sorts of printings in this style, and all these additional printings could include all the different points of view and topics that are out there in the big world.
One of the topics that fascinates me is the embedding of the words and structures into the sapphire cover lens. I was just sure this was required from an artistic viewpoint, with a major caveat being that I am not an artist, I continue to wait for the artist to connect in. One can always hope.
But just for a second, consider the imagery of those letters standing alone, silent, patient in their field of platinum, with one section of the letters held, protected, sheltered via the walls of the golden cross that extends all around them.
“So”, I thought, “why do these monolithic letters need to be held, surrounded, managed by that sapphire?” “Couldn’t they just stand free in space, on their own?” “Isn’t what they are trying to communicate enough, isn’t there some sort of majesty of them just standing there, just standing there in space?”
I could even imagine almost a little story, “The People of the Magnificent Standing Ones”
Because in Sketchup, one can really shrink oneself down to tiny, tiny size, and you can wander around these letters near to their bases. Like the letters were 20 feet tall or something. And say the sapphire was domed up and just stood as one expanse above all the letters, way up there in the sky so to speak. Why not?
So (in the story) the People of the Magnificent Standing Ones would have a tiny tunnel that they would go through to get inside the sapphire dome and they could walk among those letters and look up at the faintly blue glistening shiny sky dome way up over their heads. And, (the story could go two ways), either they understand that these are letters placed by some other civilization, or they could be a group that never have gotten themselves up above the Magnificent Standing Ones, which would mean that they don’t yet understand that the Magnificent Standing Ones are letters.
If I only understood animation, I could create that “Place of the Sapphire Space” and have those people wandering around among the Magnificent Standing Ones.
More practically, I can’t convince myself anymore about which is the more artistically appropriate construction for the Turning Prayer printing (concerning whether the sapphire material of the cover should envelope the letters and the cross, or instead just be a majestic dome up above them).
It may be that the sapphire lens should just have a contiguous dome up over all the letters and the cross, and also be domed up over the letters that form the words that bend around the periphery.
And to close, just imagine this construction technique with a faintly different twist. One could shape the sapphire so that the planar surface was elevated above the level of the circumference of the cover. Now, add the depressions, except the depressions would be for numbers, not letters, and (after you micro 3D printed these numbers into the sapphire), then you could create a watch cover where the golden numbers float up in the air above the watch face.
And if one can lay down a color layer, well, look at the varieties of sapphire, there are a lot of colors.
There are enough colors that they could make a palate for an artist. Just what could be drawn in sapphire under this transparent sapphire cover. With colors and lines, then portraits might be feasible, so one could make a printing with a sapphire powder portrait, and this portrait (if no one hit it with a hammer) would last unchanged for thousands of years. A few golden letters, some gemstones, and one has quite a cool present one could give to someone.
Here are the Sketchup drawing files that I used to create the images above
Final Turning Prayer platinum tungsten together v276
Final Turning Prayer platinum tungsten letters cross color-area together v279
Final Turning Prayer platinum tungsten letters cross color-area gemstones all together v282
Final Turning Prayer everything separated v273
Final Turning Prayer copy of v288 shows how lens is made v290
Final Turning Prayer diamond side rim back v267
Final Turning Prayer diamond side rim and tungsten disc back v268 Final Turning Prayer diamond side complete printing with lens v261
Final Turning Prayer diamond side complete printing v266
Final Turning Prayer diamond side complete printing v261
I do have a plan to get this as a YouTube, so much to do, so little time. pg
Happy Holidays